Ingredients
Equipment
Method
STEP 1: MAKE YOUR BREAD DOUGH
- In a large mixing bowl add 1,000 grams of flour, 200 grams of active sourdough starter, 650 grams of warm filtered water, and 20 grams of salt. For the next part I like to use the best tool there is, my hands! wash your hands and give this a good mix. You don’t want to knead the dough, you want to combine all the ingredients together till there is no dry streaks of flour. After a good mix, close the bowl with a lid and let the sourdough bread mixture rest for 30 minutes.

- After 1 hour- you will stretch and fold the sourdough. Gluten relaxes over time, this step will help to build up the gluten and give it strength and shape. Once you have stretched and folded all sides of the sourdough, cover it with the lid and let rest for another 30 minutes. Repeat this process 3 times.

- After 3 sets of stretch and folds, gently take out the sourdough on a clean countertop. Do not dust any flour on the countertop. Once the dough is out of the bowl, take a bench scraper and divide the dough into two equal pieces. Once it is divided- cover the dough with a tea towel and let it rest for 10 minutes.
- Once the dough rest for 10 minutes you will work with one loaf at a time. Take your first dough and with your hands stretch the sourdough out on a clean countertop. You will NOT need to wet your hands for this step. it will be a little sticky, but make sure to not add any additional flour. if the sourdough is too sticky to work with use your bench scraper to help. Next, take one side of the sourdough and fold it over to the center, then fold over the opposite side. Once the two sides are folded, roll the dough into a ball. then seal the ends. Tuck the ends underneath the dough to form a ball. After the sourdough is formed into a ball start to twist the dough on the table to create tension on the bottom. This helps to close up any open holes. Repeat the same process on the other dough.

- Now that your sourdough is shaped into a round shape- lightly flour your round banneton, you can use flour or rice flour (if you are not using proofing baskets then take a bowl and line it with a tea towel) flip your sourdough with the bottom facing up into your basket or bowl. Pinch to seal any holes. Dust the Sourdough ball with a little bit of flour, then cover it with plastic wrap (or I use these shower caps) place it inside a plastic bag, and then tie the bag so air doesn’t get inside. Place in the fridge for overnight fermentation (bulk fermentation). Repeat the same process for the other loaf.
STEP 2: CREATE A PUMPKIN SHAPE
- Place a Dutch oven into the oven with the lid closed and preheat the oven to 500F. While your oven is preheating (with the Dutch oven inside) take out a piece of parchment paper and lay it out in front of you on a countertop. Cut 4 pieces of kitchen twine about 36″ long. Tip: Soaking or coating the string in olive oil will help them not stick to the dough. Spread the twine out on the parchment paper.

- Take your loaf out of the fridge and gently flip your dough onto parchment paper. Spread the twine evenly to create eight lobes of the sourdough pumpkin. See the photos below.

- Lightly and evenly dust the surface of the dough with flour and then spread it with your hands. This will help prevent the string from sticking too much, and make your design pop!
- Readjust the strings to create equal sections. Grab the piece of string from opposite sides of the sourdough ball and tie them in a knot at the center of the dough ball. Try to keep all the knots in the same spot near the center of the top. The strings should be fairly tight against the dough, but not too tight where the string digs into the loaf. The pumpkin shape will accentuate as the sourdough bakes and expands! Cut off the excess string just above the knots.

- Use a bread lame or a (razor blade) to score a fun design into each section of the sourdough pumpkin. You can do chevron design or wheat stalks use your imagination here!
- Take out the hot Dutch oven from the oven, be careful a preheated Dutch is very hot! use oven mitts for your safety. Place the sourdough bread into the Dutch oven with the parchment paper, and bake for 30 minutes at 500 degrees F with the lid closed on the Dutch oven. After 30 minutes remove the lid from the Dutch oven and lower your heat to 450F, bake for 3-10 additional minutes (until golden brown) depending on how much color you want on your sourdough bread. Take out your sourdough bread from the oven.

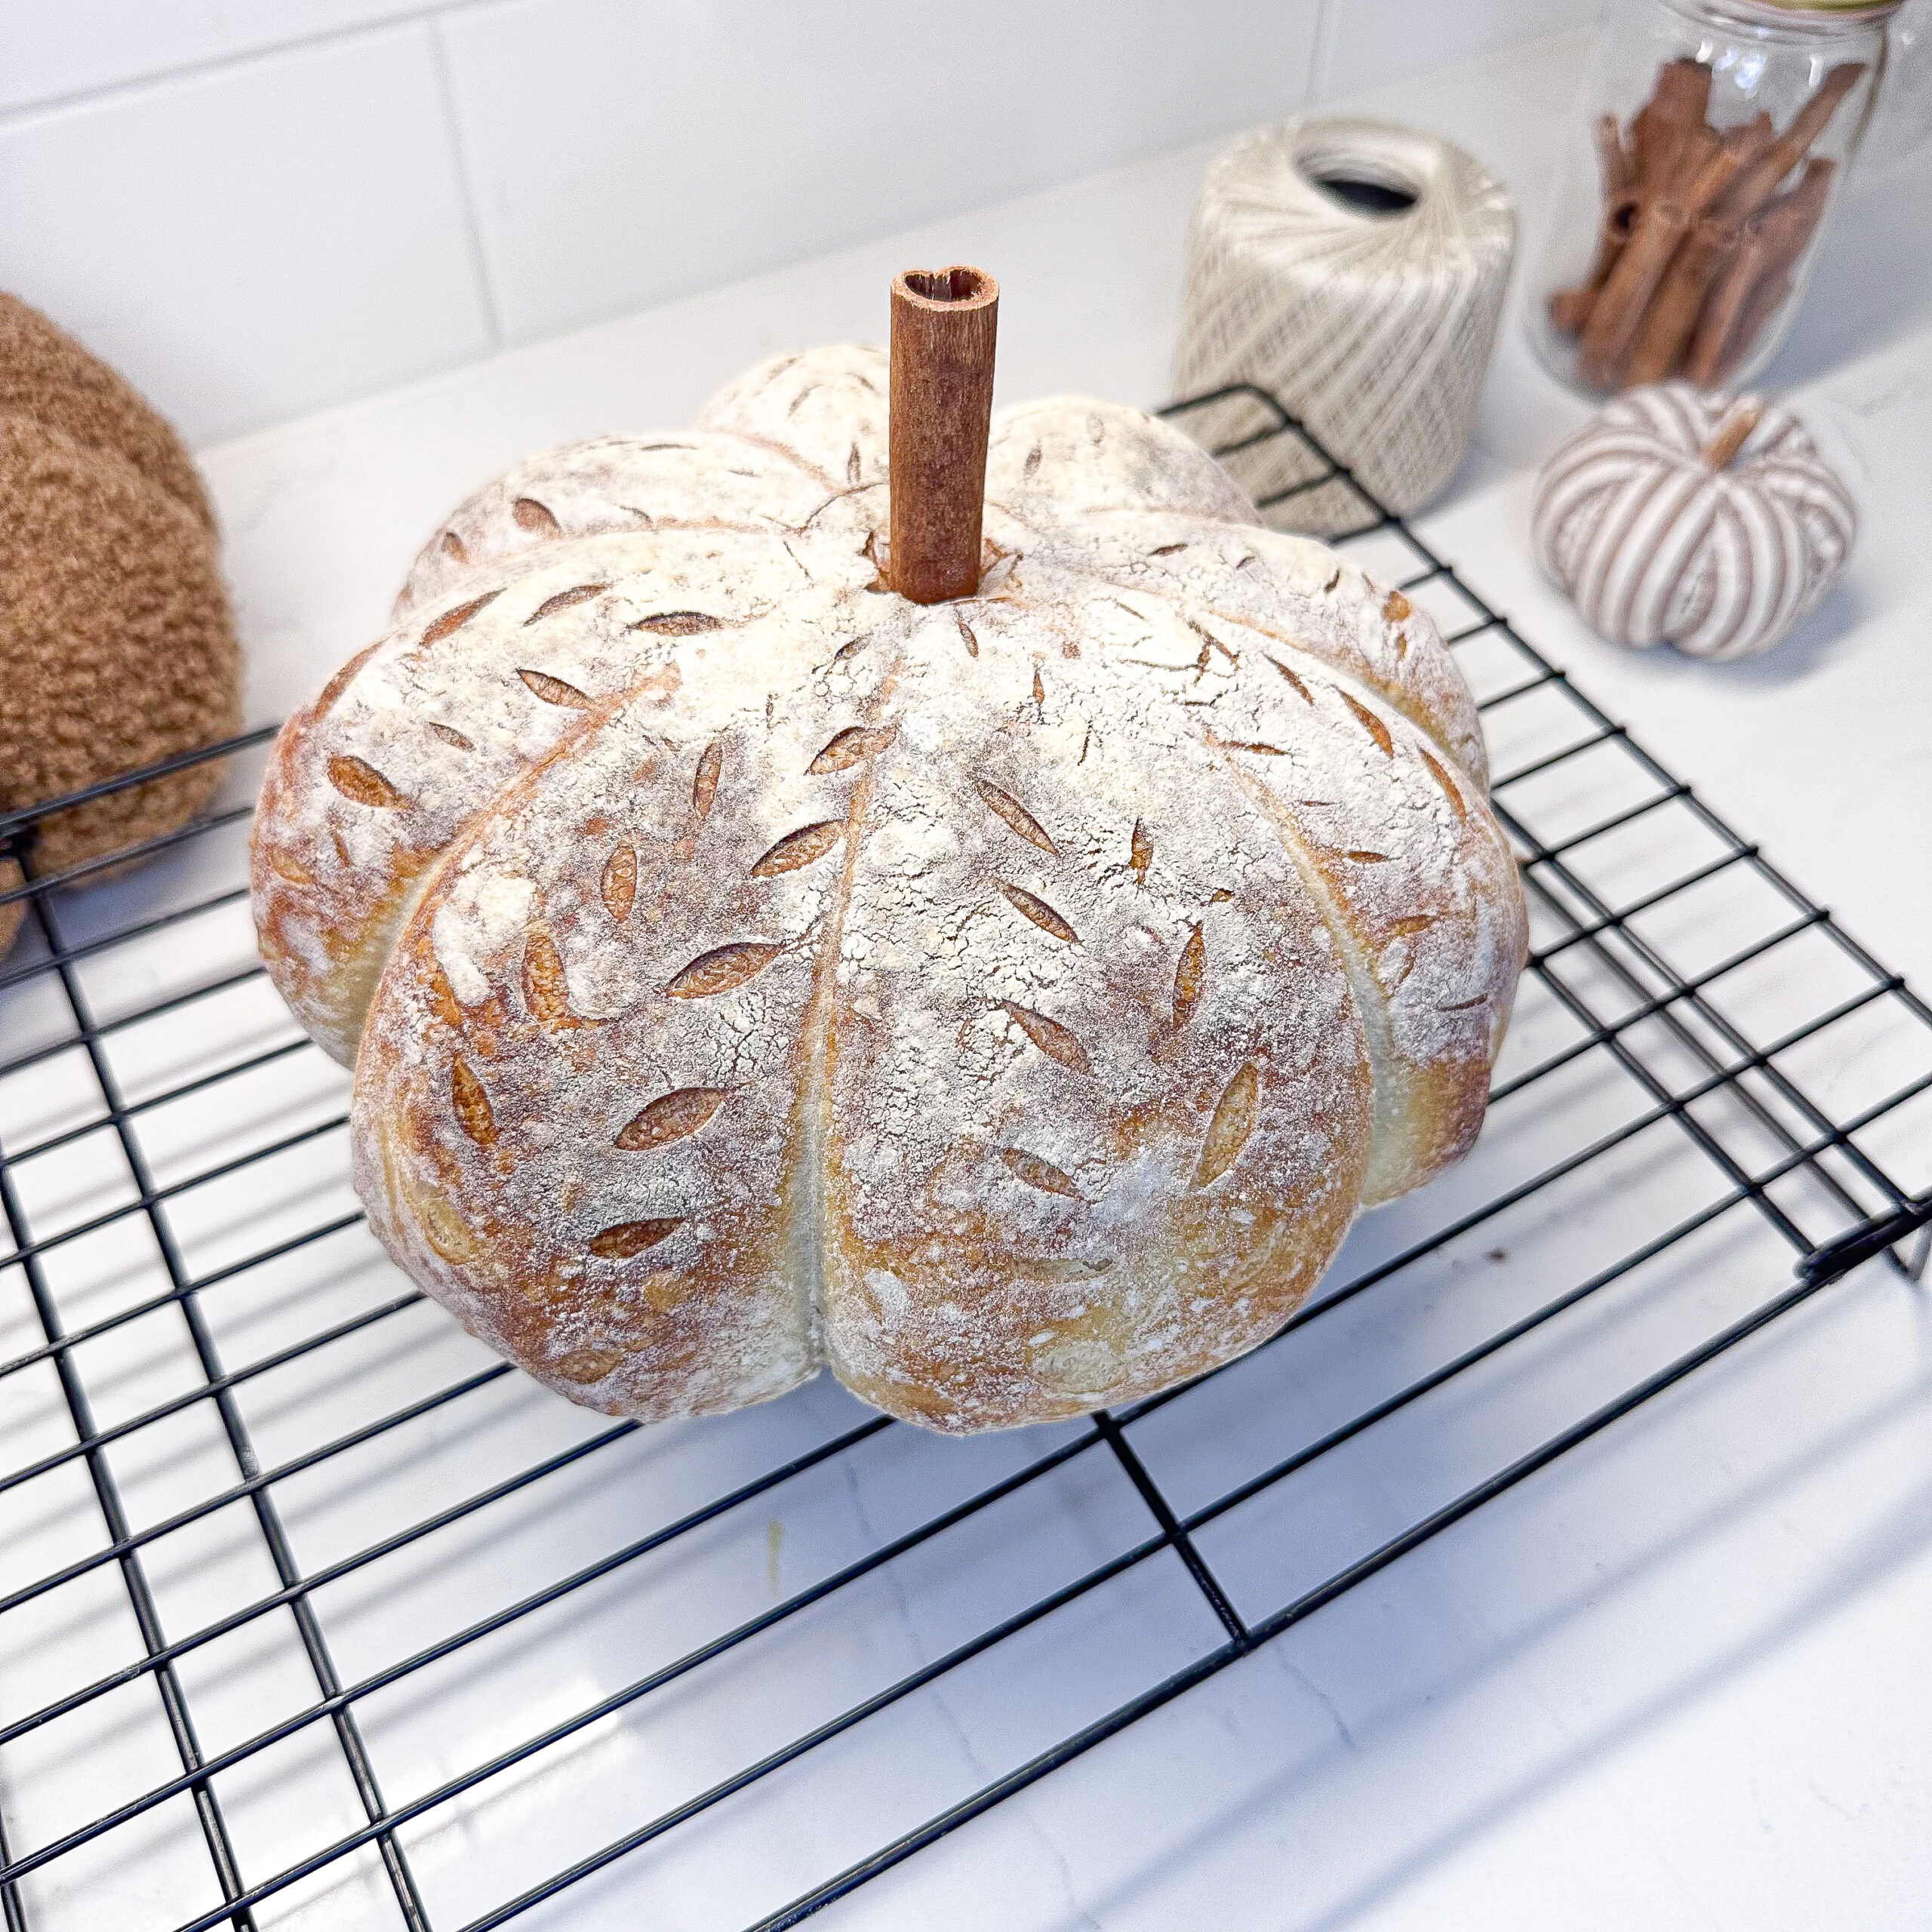
STEP 4: REMOVE STRINGS AND ENJOY!
- Place the pumpkin-shaped sourdough bread on a cooling rack for an hour before removing the baking twine.
- Add a “stem” to the top of your pumpkin-shaped sourdough to complete the look! Using a bread lame, cut a small X in the crust before inserting the cinnamon stick so it wouldn’t cause a big crack. Place the cinnamon stick into the middle of the top of the loaf to make it look like a stem.

- Cool the loaf completely before cutting into it. Use a sharp knife to slice your sourdough pumpkin loaf of bread…if you would dare!