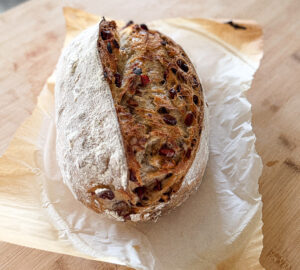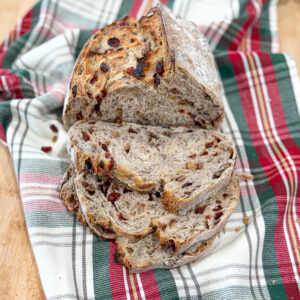
Walnut Cranberry Sourdough loaf
This festive sourdough recipe that combines chewy crumb, tart cranberries, and the perfect nutty flavor from toasted walnuts, this walnut cranberry sourdough is going to be your new favorite bread. It’s everything I love about seasonal baking — comforting, a little rustic, and so beautiful when it comes out of the oven with that deep golden brown crust. If you love cranberries this time of year, make sure to try our sourdough discard cranberry sweet bread!
Equipment
- Proofing basket
- Dutch oven
- Large mixing bowl
- Food scale
Ingredients
For the Dough
- 100 g active sourdough starter (active starter, use the float test if unsure)
- 450 g bread flour
- 50 g whole wheat flour
- 340 g water
- 10 g salt
Add-Ins
- 100 g dried cranberries (or unsweetened cranberries for more tartness)
- 100 g toasted walnuts, roughly chopped
- zest of one orange
Instructions
Mix the Dough
- In a large bowl, combine: 100 g active sourdough starter 340g warm water 450g bread flour 50g whole wheat flour 10g fine sea saltStir until a wet shaggy dough forms. It will feel slightly sticky — that’s exactly what we want with a wetter dough like this.Cover with a tea towel or plastic wrap and rest for 45 minutes.This 45-minute dough rest helps fully hydrate the whole wheat flour.
First Set of Stretch & Folds – folding in the inclusions
- After the dough has rested, perform your first set of stretch and folds: During the first stretch, sprinkle on: Toasted walnuts, Cranberries, Orange zest . Grab the top of the dough. Stretch it upward. Fold it over the center of the dough. Turn the bowl a quarter turn. Repeat 3–4 times, with a 45-minute rest between sets. The biggest tip I can give you is to make sure to keep the dough in a warm place using a heating pad. This is the one I use and love! This will help the inclusions to incorporate more evenly into the dough! And the more stretch-and-folds you do, the more evenly it will disperse! Use gentle folding motions to distribute them without tearing the dough.This step strengthens gluten and begins building surface tension in the dough. By the third fold, the dough should feel smoother, stronger, and more elastic.

Bulk Fermentation (2–3 hours)
- Place the dough in a warm place — around 80°F- 95°F is ideal. Bulk fermentation is where your dough becomes airy and strong. Look for:✔ A smoother appearance✔ Slight puffiness✔ A softer feel when you press the surface✔ Gentle bubbles around the edgesBulk fermentation is the only thing many beginners struggle with, because every dough rises differently. This is where you truly learn your dough.

Final Shape
- Shape your dough into a round boule or a batard. Dust your banneton basket (I use and love these baskets from Bulka! The quality is amazing!) with flour, and place the shaped dough inside, smooth side down. Cover with a tea towel or plastic wrap.
Cold Ferment — Overnight
- Refrigerate the shaped dough for 12-24 hours (the next day).Cold fermentation improves flavor, strengthens the dough, and makes scoring much easier.

Bake in a Hot Dutch Oven
- Place your Dutch oven in the oven and heat to 475°F. ( I use the Krustic Dutch Oven and I absolutely love and recommend it! Use code “liza15” to get $15 off! Turn the dough out onto a piece of parchment paper. Score the top of the dough (one deep slash works great). Carefully place into the hot Dutch ovenWhen the oven is ready:Bake covered for 30 minutes, then uncover and bake until deep golden brown.If you have an empty baking tray, placing it under the Dutch oven helps maximize oven spring.Move the loaf to a wire rack or cooling rack. The hardest part? Waiting for it to cool.