
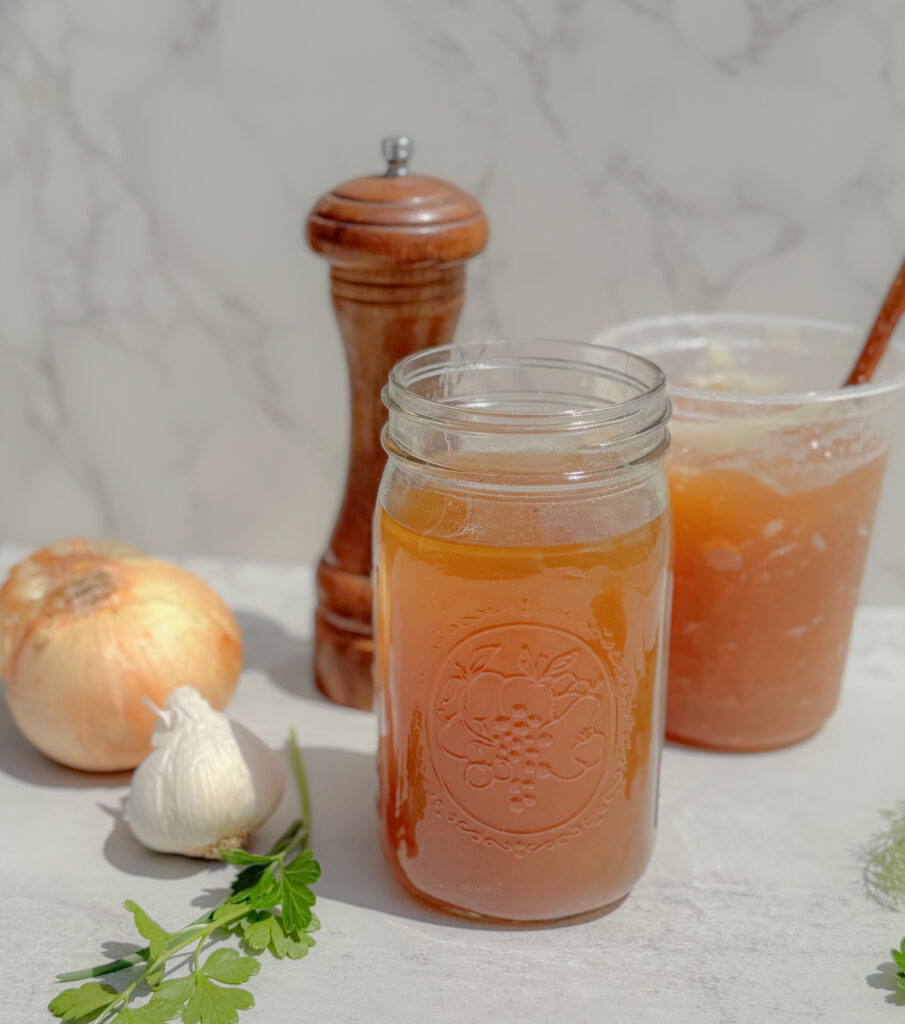
Rich, nourishing, and flavorful! Nothing beats homemade beef broth!
There’s something deeply comforting about a pot of homemade nutrient-dense bone broth gently simmering away on the stove. It fills the house with that cozy, slow-cooked aroma, and the end result is liquid gold — full of flavor, nutrients, and so many possibilities. I always keep a stash in my freezer for soups, Russian stews, gravy, or just sipping from a mug on chilly days.

If you’ve never made bone broth before, don’t worry — it’s super simple. The key is good-quality bones, a long slow simmer, and a bit of patience. Once you try this homemade version, I promise you’ll never want the boxed stuff again. Love the benefits of bone broth? Be sure to try our hot cocoa, made with bone broth!
Why Make Beef Bone Broth from Scratch?
Homemade bone broth is miles above store-bought in flavor, nutrition, and versatility. It’s naturally rich in collagen, amino acids, and minerals — thanks to all the goodness slowly extracted from the bones.
It’s also:
- Immune-supportive
- Great for gut health and joints
- Packed with flavor
- Budget-friendly (especially if you save bones from roasts or buy them in bulk)
What Kind of Bones Are Best for Broth?
For a rich, gelatinous, and nutritious bone broth, use a mix of bones that provide both marrow and collagen. Here’s what to look for:
- Marrow bones (femur, shank) – rich flavor and fat
- Knuckle bones – high in gelatin and collagen
- Neck bones – flavorful and affordable
- Oxtail – collagen-rich and makes a silky broth
- Beef feet or joints – excellent for gelatin
- Meaty bones or short ribs (optional) – add depth of flavor
Tip: Ask your local butcher for a mix! You want both meaty and connective tissue-rich bones to get the best texture and flavor.
Pint it for later!

Ingredinets
- 3–4 lbs assorted beef bones
- 2 tbsp apple cider vinegar
- 1 large onion, quartered (no need to peel)
- 2–3 carrots, roughly chopped
- 2 celery stalks, roughly chopped
- 1 head of garlic (you can roast it with the bones for more flavor)
- 1–2 bay leaves
- 1 tsp whole black peppercorns
- Optional: thyme, rosemary, parsley stems, or dried chili
- Cold water, enough to cover bones
Tools You’ll Need
- Large stockpot (at least 8 quarts) – for stovetop simmering
- Instant Pot (6 or 8 quart) – if using the pressure cooker method
- Roasting pan or sheet pan – to roast the bones for flavor
- Fine mesh strainer or cheesecloth – to strain the broth
- Mason jars or freezer-safe containers – for storing the finished broth
- Tongs – to handle hot bones and transfer them between steps
- Ladle – for serving and pouring into jars
- Skimmer or large spoon – to remove foam/scum from the top while simmering
- Jar funnel (optional but helpful) – makes pouring into jars a lot less messy
- Paper towels or a clean cloth to pat the bones dry after soaking
Step-by-Step Instructions
1. Soak the Bones (Recommended)
Before roasting, place your bones in a large bowl and cover with cold water. Let them soak for 30–60 minutes to help draw out any blood and impurities. This gives your broth a cleaner, more refined flavor. Drain and pat the bones dry before moving on.

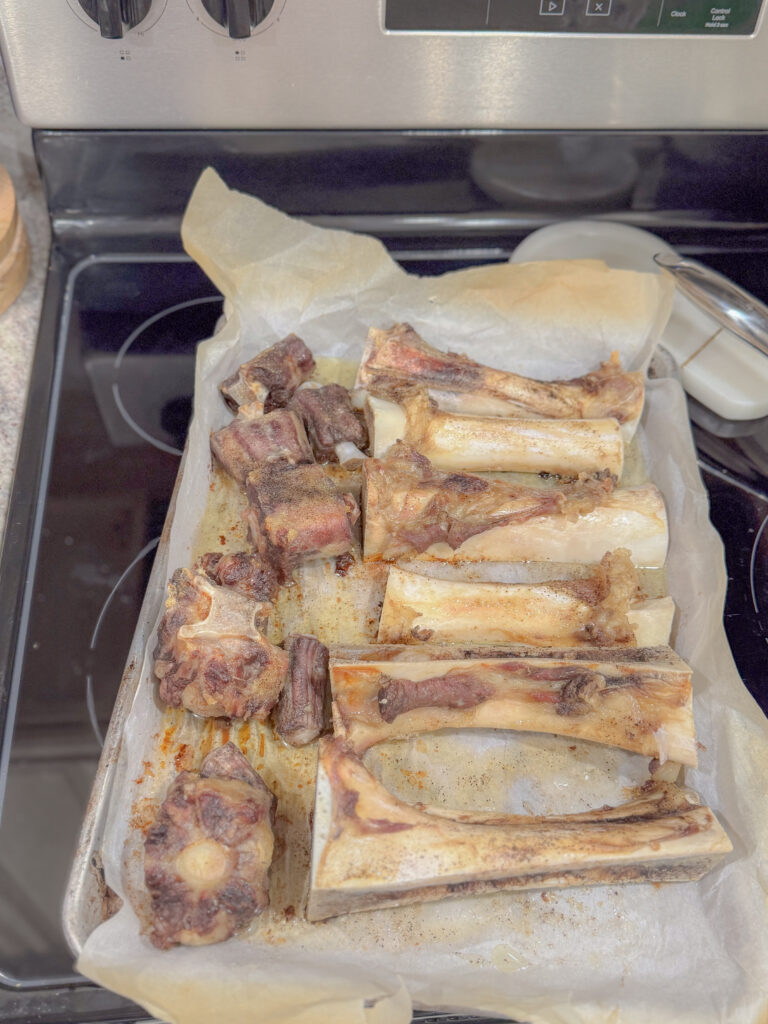
2. Roast for Flavor
Preheat your oven to 425°F (220°C). Arrange the bones on a Roasting pan or a baking sheet, along with the garlic, and roast for 30–45 minutes, or until they’re deeply browned. Roasting adds a deep, savory richness to your broth.
Kitchen Tip: After roasting, pour off the rendered fat from the pan into a mason jar and store it in the fridge. This flavorful beef fat is perfect for sautéing veggies, searing meats, or even frying eggs. Waste nothing!
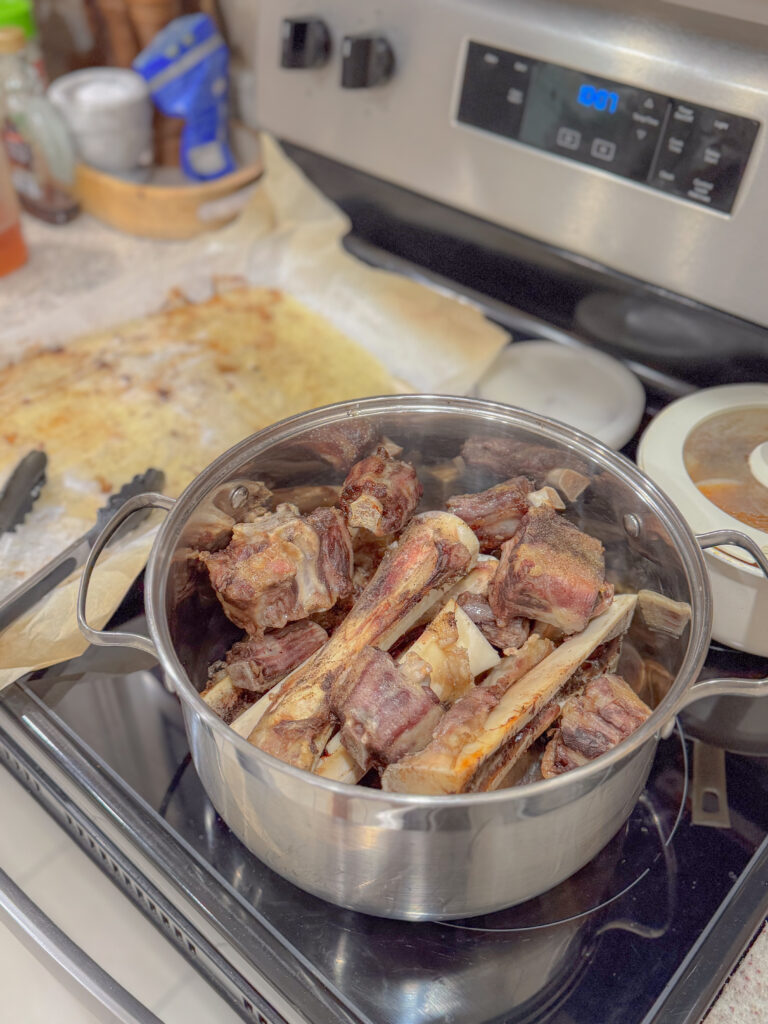
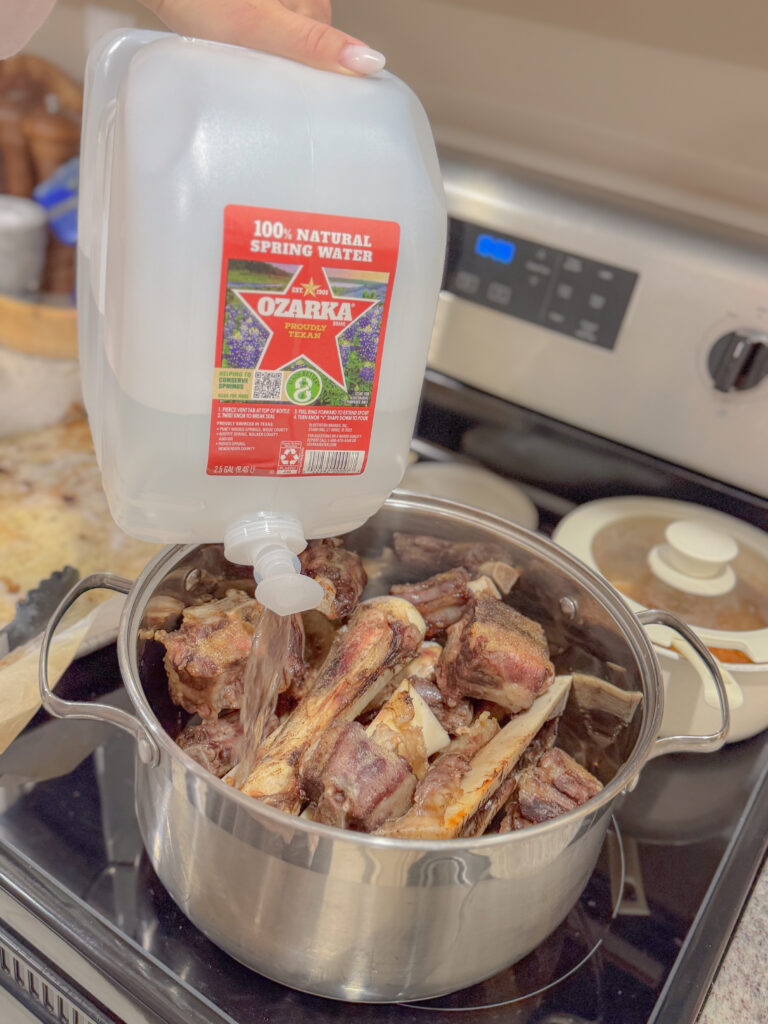
3. Transfer to a Stockpot
Place the roasted bones in a large pot. Add the vinegar and enough cold water to fully cover them. Let it sit for 30 minutes before turning on the heat — the vinegar helps break down the collagen in the bones.
4. Add the Vegetables & Aromatics
Add the onion, carrots, celery, roasted garlic, bay leaves, and any additional herbs you prefer.
5. Bring to a Simmer
Slowly bring the pot to a gentle boil. Skim off any foam or scum that rises to the surface — this helps keep the broth clear. Once it simmers, reduce the heat to low and maintain a very low simmer. Avoid using high heat during the cooking process.
6. Simmer Low & Slow
Cover with a lid and simmer on low heat for 12–24 hours. The longer it simmers, the more nutrients and flavor you extract. Add water if needed to keep bones submerged. Add more water if needed to keep the bones in water.
7. Strain and Cool
Let the beef bone broth cool for a few hours in the pot, so it’s easier to handle. Carefully remove the bones using tongs. Strain the broth through a fine-mesh strainer or cheesecloth into 1/2 gallon jars. Let it cool completely.
8. Store It
After transferring the broth to jars or containers, store it in the refrigerator. You’ll notice the fat rises and forms a seal — you can leave it on to protect the broth, or remove it if you prefer and use it instead of oil in cooking.
What’s the Right Water-to-Bone Ratio?
Here’s a simple guideline:
👉 Fill your pot halfway with bones, then top it off with cold water.
This gives you a strong, rich broth without being too diluted or too thick. If you use too many bones, you might not fully extract the flavor. Too little, and it can turn out watery.

The Jello Test: What It Means
When your broth chills in the fridge, it should set up like jello — jiggly and thick. That’s exactly what you want!
It means:
- Your broth is rich in gelatin and collagen
- You got the water-to-bone ratio just right
- You simmered long enough for maximum extraction
Don’t worry if your broth doesn’t gel perfectly the first time — it will still be nutritious and delicious.
How to Store Beef Bone Broth
- Fridge: Keeps for up to 5 days in a sealed jar
- Freezer: Freeze in jars, quart containers, or silicone molds for up to 6 months
- Pro Tip: Freeze some in ice cube trays for quick portions
Ways to Use Bone Broth
- Sip it warm with salt, lemon, or fresh herbs
- Use as the base for soups, stews, or sauces
- Cook rice, quinoa, or pasta in it
- Add richness to mashed potatoes, beans, or even gravy
Instant Pot Beef Bone Broth (Faster Method!)
If you’re short on time but still want a rich, nourishing bone broth, the Instant Pot is your best friend. You’ll get a flavorful, collagen-rich broth in a fraction of the time compared to stovetop simmering. I still like to roast my bones first for extra depth, but you can skip this step if you’re in a hurry.
What You’ll Need:
Same ingredients as the stovetop version:
- 2-2.5 lbs assorted beef bones (marrow, knuckle, neck, etc.)
- 1–2 tbsp apple cider vinegar
- Onion, carrots, celery, garlic, bay leaves, peppercorns
- Optional herbs and add-ins
- Water (fill below for fill line guidance)
Instructions:
- Optional: Soak and roast the bones
For the best flavor, soak bones in cold water for 30–60 minutes, then roast at 425°F for 30–45 minutes until browned. Drain the oil. - Add bones and ingredients to the Instant Pot
Place roasted bones, vinegar, vegetables, and aromatics into the Instant Pot. - Fill with cold water
Add enough cold water to reach just below the “Max Fill” line. Don’t overfill! The pressure cooker needs space to build pressure. - Pressure cook
Secure the lid and set the valve to the Sealing Position. Cook on High Pressure for 2 hours (120 minutes). You can go up to 3 hours for extra depth. - Natural release
Let the pressure release naturally — this may take 30–40 minutes. Don’t quick release (trust me, it’ll be messy and steamy!). - Strain and store
Carefully remove the large bones, then strain the bone broth through a fine-mesh sieve into a bowl or jars. Let cool completely before refrigerating or freezing.
Notes for Instant Pot Success:
- Your broth might not gel quite as thick as stovetop, but it’ll still be deeply flavorful and nutrient-rich.
- If your pot is smaller (6 qt), reduce bones to 2–3 lbs to avoid overfilling.
- You can reuse the bones for a second, lighter broth batch immediately after.
FAQ
Can I skip the roasting step?
Yes, but your broth will be lighter in flavor and color. Roasting gives it that deep, savory depth.
Why soak the bones first?
It pulls out blood and impurities, leading to a cleaner-tasting broth with less scum to skim later.
What if my broth doesn’t gel?
No worries — it’s still nourishing! Try simmering longer next time or adding more connective tissue bones like knuckle or feet.
Can I reuse the bones for a second batch?
Yes! It’s called remouillage, and it makes a lighter second broth. Not as rich, but still great for cooking or soups.
How Much Protein Is in Bone Broth?
Homemade beef bone broth can pack a surprising amount of protein, especially if it’s gelatinous and slow-simmered.
- On average, 1 cup of homemade beef bone broth contains 6–12 grams of protein, depending on its concentration.
- If your broth gels when chilled (like Jello), that’s a sign it’s rich in collagen and amino acids like glycine, proline, and glutamine — all great for joint health, digestion, skin, and immune support.
Bonus: Because it’s so easy to digest, bone broth is a great way to sneak extra protein into your day — especially when you’re not in the mood for a full meal.
Nutrition tip: Sip on a hot cup of bone broth in the morning instead of coffee, use it post-workout, or swap it in for water when cooking grains to add a protein boost.

Beef bone broth
Ingredients
Equipment
Method
- Before roasting, place your bones in a large bowl and cover with cold water. Let them soak for 30–60 minutes to help draw out any blood and impurities. This gives your broth a cleaner, more refined flavor. Drain and pat the bones dry before moving on.

- Preheat your oven to 425°F (220°C). Arrange the bones on a Roasting pan or a baking sheet, along with the garlic, and roast for 30–45 minutes, or until they’re deeply browned. Roasting adds a deep, savory richness to your broth.Kitchen Tip: After roasting, pour off the rendered fat from the pan into a mason jar and store it in the fridge. This flavorful beef fat is perfect for sautéing veggies, searing meats, or even frying eggs. Waste nothing!

- Place the roasted bones in a large pot. Add the vinegar and enough cold water to fully cover them. Let it sit for 30 minutes before turning on the heat — the vinegar helps break down the collagen in the bones.

- Add the onion, carrots, celery, roasted garlic, bay leaves, and any additional herbs you prefer.
- Slowly bring the pot to a gentle boil. Skim off any foam or scum that rises to the surface — this helps keep the broth clear. Once it simmers, reduce the heat to low and maintain a very low simmer. Avoid using high heat during the cooking process.
- Cover with a lid and simmer on low heat for 12–24 hours. The longer it simmers, the more nutrients and flavor you extract. Add water if needed to keep bones submerged. Add more water if needed to keep the bones in water.
- Let the beef bone broth cool for a few hours in the pot, so it’s easier to handle. Carefully remove the bones using tongs. Strain the broth through a fine-mesh strainer or cheesecloth into 1/2 gallon jars. Let it cool completely.
- After transferring the broth to jars or containers, store it in the refrigerator. You’ll notice the fat rises and forms a seal — you can leave it on to protect the broth, or remove it if you prefer and use it instead of oil in cooking.

Notes
What’s the Right Water-to-Bone Ratio?
Here’s a simple guideline:👉 Fill your pot halfway with bones, then top it off with cold water. This gives you a strong, rich broth without being too diluted or too thick. If you use too many bones, you might not fully extract the flavor. Too little, and it can turn out watery.
The Jello Test: What It Means
When your broth chills in the fridge, it should set up like jello — jiggly and thick. That’s exactly what you want! It means:- Your broth is rich in gelatin and collagen
- You got the water-to-bone ratio just right
- You simmered long enough for maximum extraction
How to Store Beef Bone Broth
- Fridge: Keeps for up to 5 days in a sealed jar
- Freezer: Freeze in jars, quart containers, or silicone molds for up to 6 months
- Pro Tip: Freeze some in ice cube trays for quick portions


Reader Interactions