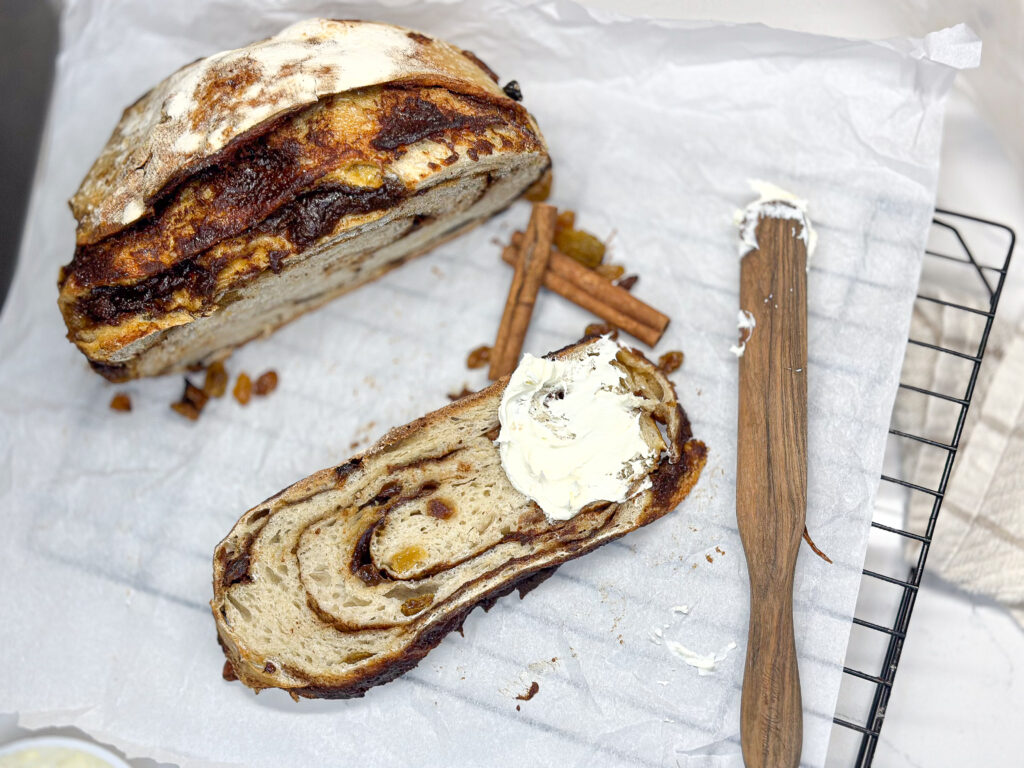
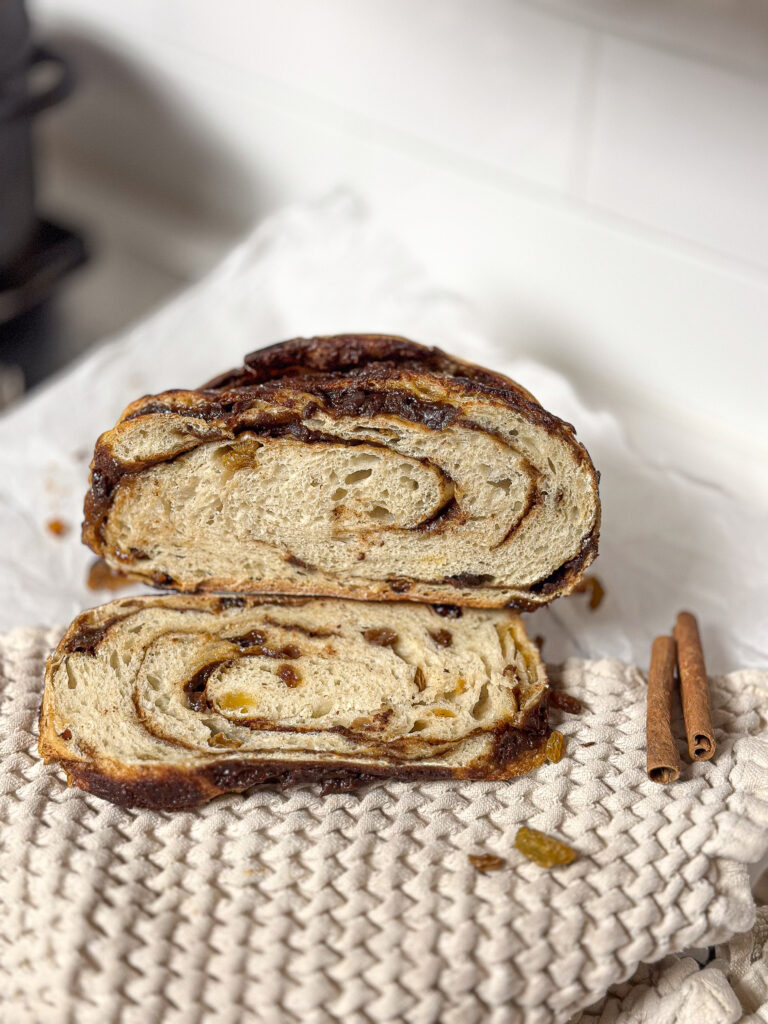
This sourdough cinnamon raisin bread has beautiful swirls of brown sugar, butter, and cinnamon with raisins throughout the fluffy sourdough.

When I bake this sourdough cinnamon raisin bread, and my house fills up with the most delicious smell, it takes me back to my childhood memories! This recipe takes sourdough to the next level! Cinnamon and brown sugar swirled into the loaf make the perfect bread!
Baking a loaf of sourdough cinnamon raisin bread is pure therapy. Not only will it fill your kitchen with delicious smells of yeasty goodness, but you’ll also walk away with a handful of life lessons and a piece of unbelievably delicious bread. This no-knead bread will become something you bake for your family weekly! This sourdough bread is baked in a Dutch oven to develop a crispy, golden crust, and the inside has a fluffy, sweet, and perfectly tangy crumb, which combines perfectly with the sweet raisins and brown sugar.
Pin it for later!

AS AN AMAZON ASSOCIATE, THIS POST MAY CONTAIN AFFILIATE LINKS. THIS WILL NOT CHANGE YOUR PRICE, BUT SHARE SOME COMMISSION WITH OUR FAMILY.
The second I saw videos circling the internet, I immediately knew I had to learn how to bake sourdough cinnamon raisin bread! I have tried many times to perfect this recipe, not that my children minded; they love it when I make them this loaf! Now, they weren’t all terrible, but I was on the hunt to find THE perfect recipe! And I finally landed on a good technique. This recipe, paired with this technique, gives the loaf a golden crunchy crust, and the inside has an irresistibly soft crumb with beautiful cinnamon and brown sugar swirls.
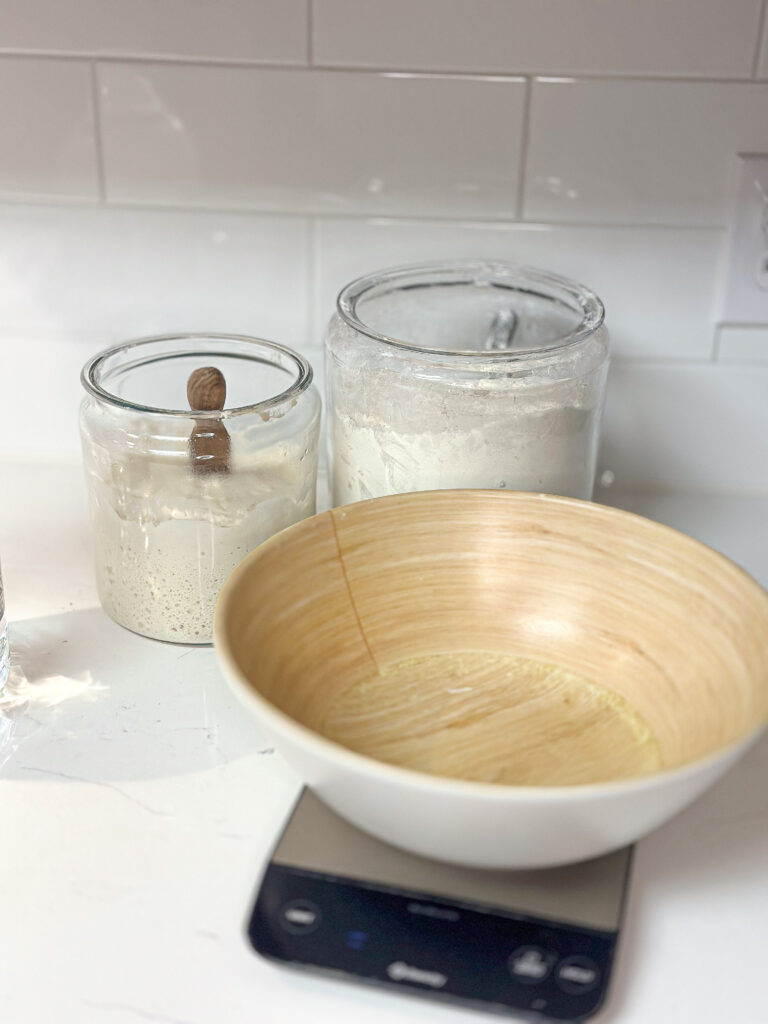
BREAD MAKING TOOLS
Sourdough bread has been made for thousands of years without any modern tools. However, some equipment is available to make this process a little easier.
- Food scale- There is one tool that, in my opinion, is necessary: a food weight scale. When it comes to baking sourdough bread, precision is key! There’s no better way to measure accuracy than using a digital food
- Jar- A good jar to grow your sourdough starter is also important!
- Dutch oven- Last but not least, you will need a Dutch oven. A Dutch oven helps the bread to get the delicious crunchy crust that sourdough bread is famous for. Without a Dutch oven, it will be hard to achieve this. Ok! Now that you have all your tools let’s start to bake!
- 9-inch bowl or a banneton basket
WHAT YOU WILL NEED TO BAKE SOURDOUGH CINNAMON RAISIN BREAD
Sourdough bread consists of a few basic ingredients you already have in your pantry! Flour, water, salt, cinnamon, brown sugar, raisins, and LEAVENED sourdough starter. Adding inclusions to your sourdough loaf is a pretty simple process. It is basically adding whatever you want to a basic sourdough loaf. First of all, you will need a good sourdough starter. As I mentioned, a starter is your rising component in bread making. Without this, your bread will NOT rise.
IS YOUR SOURDOUGH BREAD BURNING FROM THE BOTTOM WHEN BAKED?
- Placing something between your Dutch oven and the base of your oven can lower the heat transfer underneath. Try leaving a sheet pan on the lower rack than the Dutch oven.
- Another trick to prevent sourdough bread from burning is to cut out a silicone mat to fit your Dutch oven. And place it on the bottom of the Dutch.
INGREDIENTS FOR SOURDOUGH CINNAMON BREAD:
- 500 grams of bread Flour– baker’s flour
- 325 grams of filtered water
- 10 grams salt
- 100 grams active sourdough starter (fed in the last 12 hours)
- 1/2 cup brown sugar
- 2 tablespoons cinnamon
- 4 tablespoons butter
- 1 cup raisins- golden or regular raisins
You can use any flour for this recipe. Although different flours might give you a different outcome, it will still be delicious! I’ve used many flours in the past. I usually use what I have on hand at that moment. I have used all-purpose, einkorn, or unbleached organic all-purpose bread flour, which are all good options. I had the most success using baker’s flour.
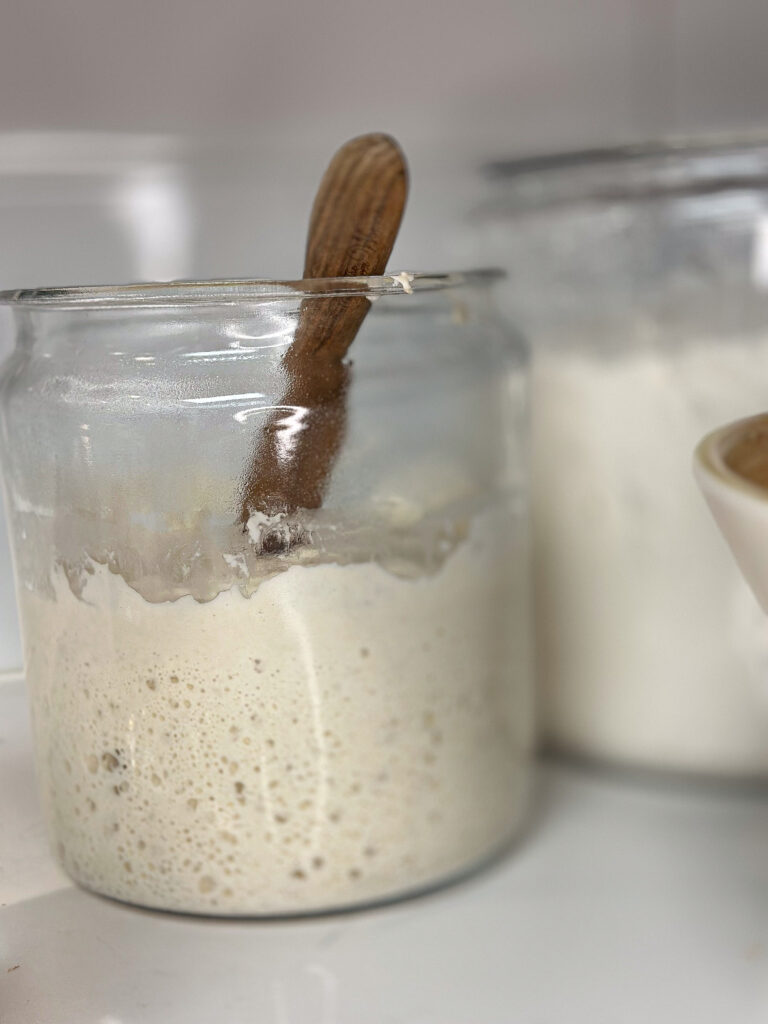
The most important component in this recipe is the sourdough starter! In order to make a delicious loaf of sourdough cinnamon raisin bread, you need to use an active starter that has been fed within 4-12 hours before use. To check if your sourdough starter is ready, do the float test. Drop a spoon of your sourdough starter into some water. If it floats, that means it is ready to use! If it does not, it either needs more time to rise, or your starter is weakened. If you want to grow your own sourdough starter from scratch, follow this easy guide.
HOW TO MAKE SOURDOUGH BREAD
Add all of the dough ingredients: 500 grams of flour, 100 grams of active sourdough starter, 325 grams of warm water, and 10 grams of salt ( i use sea salt) in a large mixing bowl. For the next part, I like to use my hands, which are the best tools! Wash your hands and mix this well to form a shaggy dough. You don’t need to knead the dough; combine all the ingredients together till there are no dry streaks of flour. The dough will be very sticky. You might be tempted to add more flour, but trust the process! Do not add more flour than what the recipe is asking for.
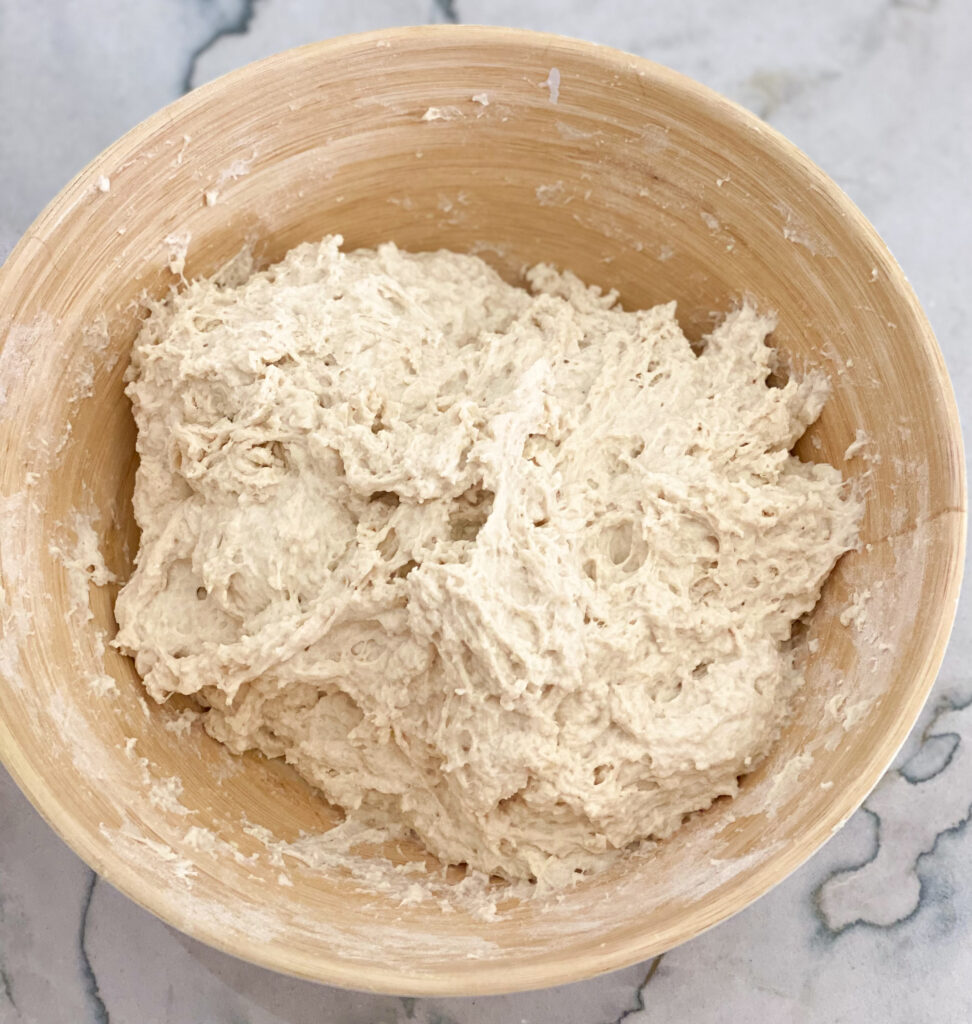
After a good mix, close the bowl with a lid and let the sourdough bread mixture rest for 1 hour. For this step, you can cover the dough with plastic wrap, a tea towel, or a lid. You don’t want a tight seal on the sourdough. You still want air to circulate into the dough to help ferment it. Yet you don’t want the top of the dough to develop a hard crust, either.
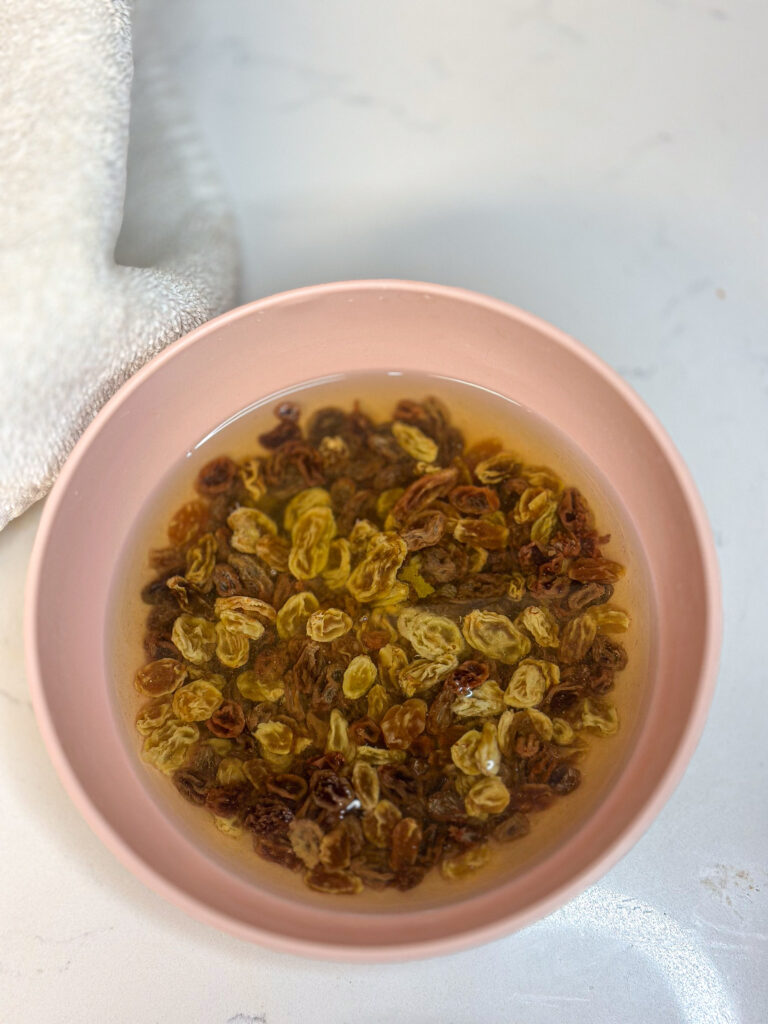
While the dough is autolysing, add the raisins to a small bowl and pour hot water over it. This will help the raisins to rehydrate.
I would recommend keeping a cup with water next to the bowl, and this will be used to dip your fingers to get them wet to keep the sourdough from sticking to your hands while you are doing the next step.
Stretch and folds
Drain the raisins, then add 1/3 of the raisins on top of the dough, then perform the stretch and fold the sourdough, adding the raisins between every stretch and fold till they are all incorporated. Gluten relaxes over time. This step will help build up the gluten and give it strength and shape, resulting in a beautiful rise when baking. This will also help incorporate the raisins into the loaf.

How to do stretch and folds
Grab one side of the dough with wet hands and stretch the sourdough as far as it lets you. Be gentle not to rip the dough, then fold it over to the middle of the bowl. Repeat this process on all sides till you go around the full circle. Once you have stretched and folded all sides of the sourdough, cover it with a damp towel and let it rest for another 45 minutes. You will need to perform a total of 3 sets of stretches and folds with 45 minutes of rest in between each one.
(After the last stretch and fold, cover the dough and let it rest for 45 minutes)

Gently take out the sourdough on a clean countertop. Do not dust any flour on the countertop. Once the dough is out of the bowl, cover it with a tea towel and let it rest for 10 minutes. This step will ensure that your dough relaxes, making it easier to stretch it for the next step.
Lamination
Gently start to stretch the raisin sourdough into a rectangle. Use your hands to stretch the dough out on the countertop; do not use a rolling pin, as it will disturb the bubbles forming in the dough. You will NOT need to wet your hands for this step. It will be a little sticky, but make sure not to add any additional flour. If the sourdough is too sticky to work with, use your bench scraper to help. You will not need to stretch the dough out too thin. If you stretch it too thinly, the sugar will seep out during the final shaping.

Combine softened butter, brown sugar, cinnamon, and flour in a small bowl to form a paste.
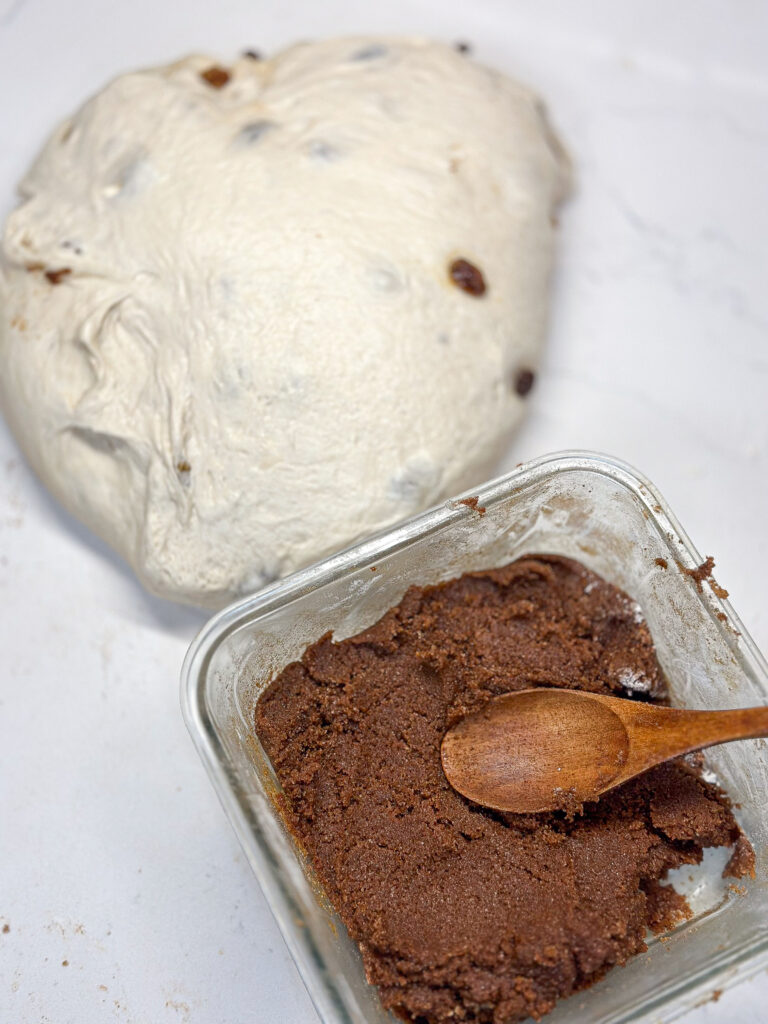
Spread 1/3 of the butter mixture onto the sourdough, leaving a 1-inch border. Fold the dough over 1/3 of the way, add half of the mixture that is left on top of the folder part, then fold it over again, and add the remaining sugar mixture. Fold over the last piece. It should be in a log shape.

Pinch the ends shut to prevent the sugar from leaking out.

Shaping the boule
Roll the dough into a ball and tuck the ends underneath the dough to form a boule. After the sourdough is formed into a boule, twist the dough on the table to create tension on the bottom, being gentle not to rip the dough anywhere. This helps to close up any open holes on the bottom.
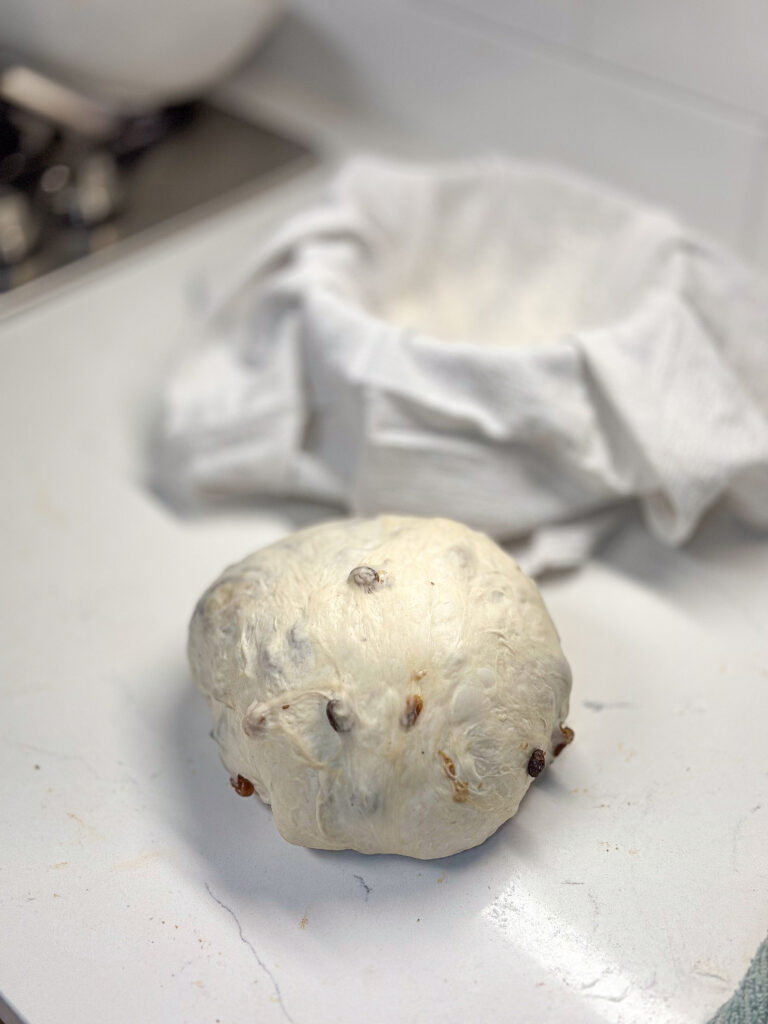
Now that your sourdough is shaped into a ball- lightly flour a 9-inch bowl lined with a flour sack towel using rice flour. Flip your sourdough cinnamon swirl bread into the banneton basket with the bottom facing up. Pinch to seal any holes. Dust the Sourdough ball with a little bit of flour, then cover it with saran wrap or a shower cap, place it inside a plastic bag if you don’t have a lid that fits the bowl, then tie the bag so air doesn’t get inside. Place in the fridge for overnight bulk fermentation. The loaf will rise in the fridge up to 30%.
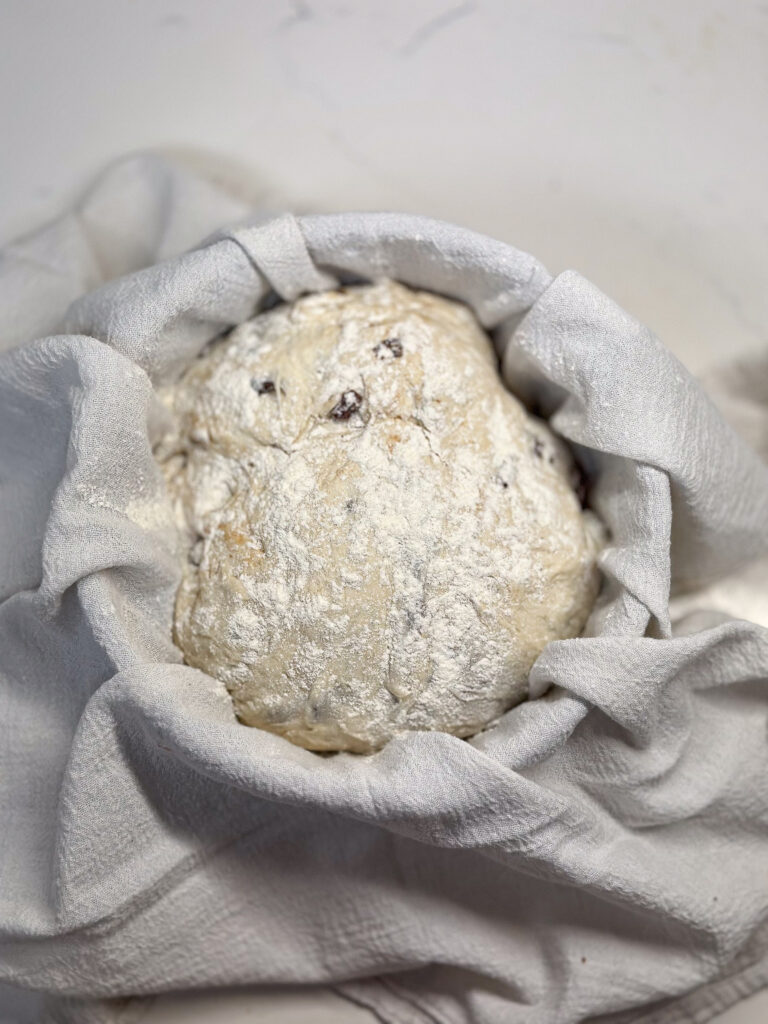
TIME TO BAKE YOUR SOURDOUGH CINNAMON SWIRL BREAD
Place a Dutch oven into the oven with the lid closed the next day and preheat the oven to 450F. Once it reaches 450 degrees Fahrenheit, leave the Dutch oven inside the oven for 30 minutes.
Remove your loaf from the fridge and gently flip your dough onto a piece of parchment paper big enough to cover all the bottom and sides of your Dutch oven. This will catch any of the sugar that might leak out to prevent a mess in your Dutch oven.
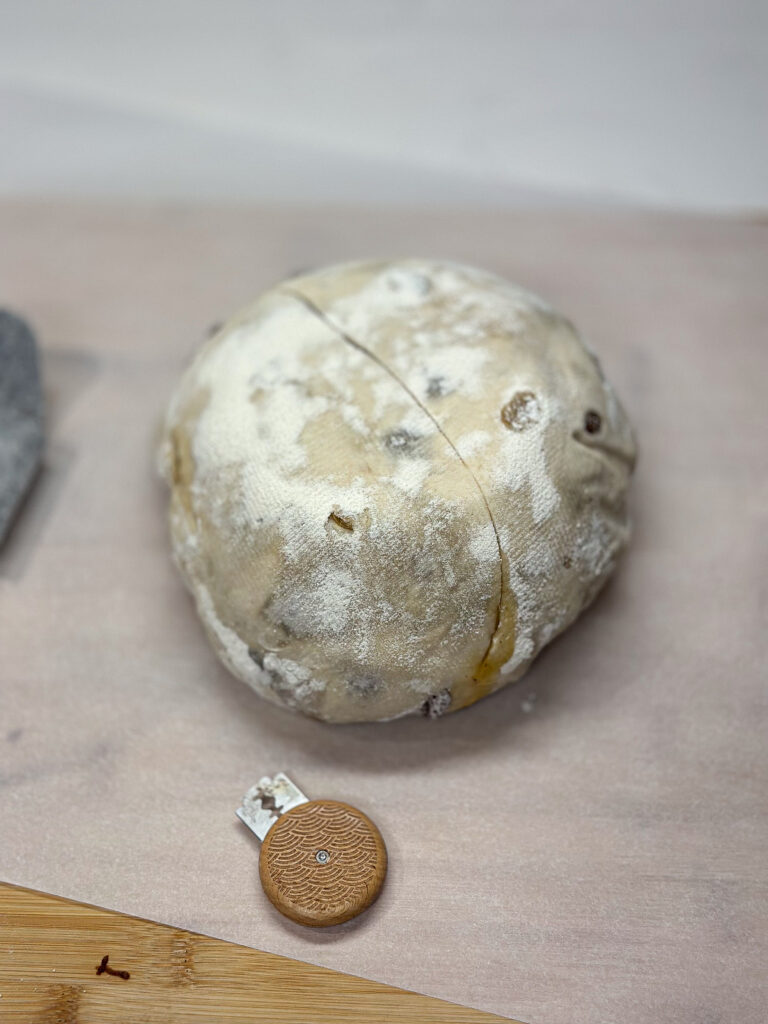
This is the time to score your bread! When the sourdough bread is baking in the oven, it rises to almost double its size, and if you don’t score it, you will have random cracks throughout the loaf. Scoring gives you control over where you want the bread to expand. Using a lame ( this is the one I use and recommend!), make one deep score in the center of the sourdough cinnamon raisin bread.
Baking the sourdough loaf
Take the Dutch oven out of the oven; be careful; a preheated Dutch is very hot! Use oven mitts for your safety. Place the sourdough bread into the Dutch oven with the parchment paper, and bake for 40 minutes with the lid closed on the Dutch oven.
Remove the lid from the Dutch oven, lower your heat to 425F, and bake for 3-10 minutes or until golden brown. Depending on how much color you want on your sourdough cinnamon raisin bread.

Take out your sourdough cinnamon raisin bread from the oven and place it on a cooling wire rack for two hours before you slice into it. I know it’s tempting, but it is worth the wait. Most of the time, we are impatient to wait till the bread cools and cut into it right away and end up waiting anyway because it’s way too hot to eat. Be careful; the butter and sugar are very hot!

Enjoy! I hope your household will become as obsessed as we are with this sourdough cinnamon raisin bread! The best way to have leftover sourdough cinnamon swirl raisin bread is to make thick slices of French toast, then drizzle some warm maple syrup over it! Or toast it, then slather some cream cheese over it! Oh my, my mouth is watering just thinking about it!

SOURDOUGH CINNAMON RAISIN BREAD
Equipment
- Food scale- There is one tool that, in my opinion, is necessary: a food weight scale. When it comes to baking sourdough bread, precision is key! There’s no better way to measure accuracy than using a digital food
- Dutch oven- Last but not least, you will need a Dutch oven. A Dutch oven helps the bread to get the delicious crunchy crust that sourdough bread is famous for. Without a Dutch oven, it will be hard to achieve this. Ok! Now that you have all your tools let’s start to bake!
- 9-inch bowl or Proofing baskets
- lame – for scoring
- Parchment paper
Ingredients
- 100 grams leavened sourdough starter
- 325 grams warm filtered water
- 500 grams bakers flour or bread flour
- 10 grams salt
- 1/2 cup brown sugar
- 2 tbl cinnamon
- 4 tbl softened butter
- 1 cup raisins
Instructions
- Add all of the dough ingredients: 500 grams of flour, 100 grams of active sourdough starter, 325 grams of warm water, and 10 grams of salt ( i use sea salt) in a large mixing bowl. For the next part, I like to use my hands, which are the best tools! Wash your hands and mix this well to form a shaggy dough. You don’t need to knead the dough; combine all the ingredients together till there are no dry streaks of flour. The dough will be very sticky. You might be tempted to add more flour, but trust the process! Do not add more flour than what the recipe is asking for.

- After a good mix, close the bowl with a lid and let the sourdough bread mixture rest for 1 hour. For this step, you can cover the dough with plastic wrap, a tea towel, or a lid. You don’t want a tight seal on the sourdough. You still want air to circulate into the dough to help ferment it. Yet you don’t want the top of the dough to develop a hard crust, either.
- While the dough is autolysing, add the raisins to a small bowl and pour hot water over it. This will help the raisins to rehydrate.

- Drain the raisins, then add 1/3 of the raisins on top of the dough, then perform the stretch and fold the sourdough, adding the raisins between every stretch and fold till they are all incorporated. Gluten relaxes over time. This step will help build up the gluten and give it strength and shape, resulting in a beautiful rise when baking. This will also help incorporate the raisins into the loaf.

- Grab one side of the dough with wet hands and stretch the sourdough as far as it lets you. Be gentle not to rip the dough, then fold it over to the middle of the bowl. Repeat this process on all sides till you go around the full circle. Once you have stretched and folded all sides of the sourdough, cover it with a damp towel and let it rest for another 45 minutes. You will need to perform a total of 3 sets of stretches and folds with 45 minutes of rest in between each one.(After the last stretch and fold, cover the dough and let it rest for 45 minutes)

- Gently take out the sourdough on a clean countertop. Do not dust any flour on the countertop. Once the dough is out of the bowl, cover it with a tea towel and let it rest for 10 minutes. This step will ensure that your dough relaxes, making it easier to stretch it for the next step.
- Gently start to stretch the raisin sourdough into a rectangle. Use your hands to stretch the dough out on the countertop; do not use a rolling pin, as it will disturb the bubbles forming in the dough. You will NOT need to wet your hands for this step. It will be a little sticky, but make sure not to add any additional flour. If the sourdough is too sticky to work with, use your bench scraper to help. You will not need to stretch the dough out too thin. If you stretch it too thinly, the sugar will seep out during the final shaping.

- Combine softened butter, brown sugar, cinnamon, and flour in a small bowl to form a paste.

- Spread 1/3 of the butter mixture onto the sourdough, leaving a 1-inch border. Fold the dough over 1/3 of the way, add half of the mixture that is left on top of the folder part, then fold it over again, and add the remaining sugar mixture. Fold over the last piece. It should be in a log shape.

- Pinch the ends shut to prevent the sugar from leaking out.
- Roll the dough into a ball and tuck the ends underneath the dough to form a boule. After the sourdough is formed into a boule, twist the dough on the table to create tension on the bottom, being gentle not to rip the dough anywhere. This helps to close up any open holes on the bottom.

- Now that your sourdough is shaped into a ball- lightly flour a 9-inch bowl lined with a flour sack towel using rice flour. Flip your sourdough cinnamon swirl bread into the banneton basket with the bottom facing up. Pinch to seal any holes. Dust the Sourdough ball with a little bit of flour, then cover it with saran wrap or a shower cap, place it inside a plastic bag if you don’t have a lid that fits the bowl, then tie the bag so air doesn’t get inside. Place in the fridge for overnight bulk fermentation. The loaf will rise in the fridge up to 30%.

- Place a Dutch oven into the oven with the lid closed the next day and preheat the oven to 450F. Once it reaches 450 degrees Fahrenheit, leave the Dutch oven inside the oven for 30 minutes.
- Remove your loaf from the fridge and gently flip your dough onto a piece of parchment paper big enough to cover all the bottom and sides of your Dutch oven. This will catch any of the sugar that might leak out to prevent a mess in your Dutch oven.
- This is the time to score your bread! When the sourdough bread is baking in the oven, it rises to almost double its size, and if you don’t score it, you will have random cracks throughout the loaf. Scoring gives you control over where you want the bread to expand. Using a lame ( this is the one I use and recommend!), make one deep score in the center of the sourdough cinnamon raisin bread.

- Take the Dutch oven out of the oven; be careful; a preheated Dutch is very hot! Use oven mitts for your safety. Place the sourdough bread into the Dutch oven with the parchment paper, and bake for 40 minutes with the lid closed on the Dutch oven.Remove the lid from the Dutch oven, lower your heat to 425F, and bake for 3-10 minutes or until golden brown. Depending on how much color you want on your sourdough cinnamon raisin bread.

- Take out your sourdough cinnamon raisin bread from the oven and place it on a cooling wire rack for two hours before you slice into it. I know it’s tempting, but it is worth the wait. Most of the time, we are impatient to wait till the bread cools and cut into it right away and end up waiting anyway because it’s way too hot to eat. Be careful; the butter and sugar are very hot!






Reader Interactions