
I have been baking sourdough bread for over two years and can confidently say I have mastered the basic recipe. However, I don’t want to settle for just one recipe and have been exploring different ways to add more flavor and nutrients to my sourdough. Recently, I discovered that adding chia seeds to the basic sourdough recipe can take it to a whole new level of deliciousness. It has become my favorite addition, and I can vouch for its taste.

I’m so excited that I learned a new technique to make my sourdough bread even better! I’ve discovered a way to create a softer crumb without losing the crispy crust by using higher hydration. I’m looking forward to experimenting and trying new and fun ways to bake sourdough. This experience has inspired me to keep exploring and developing creative techniques, and I can’t wait to see what delicious loaves I can come up with next! Many bakers use 80-90% hydration, but this was my first time using this method.
Try other soutdpigh recipes!
Ingredients for the sourdough chia seed bread
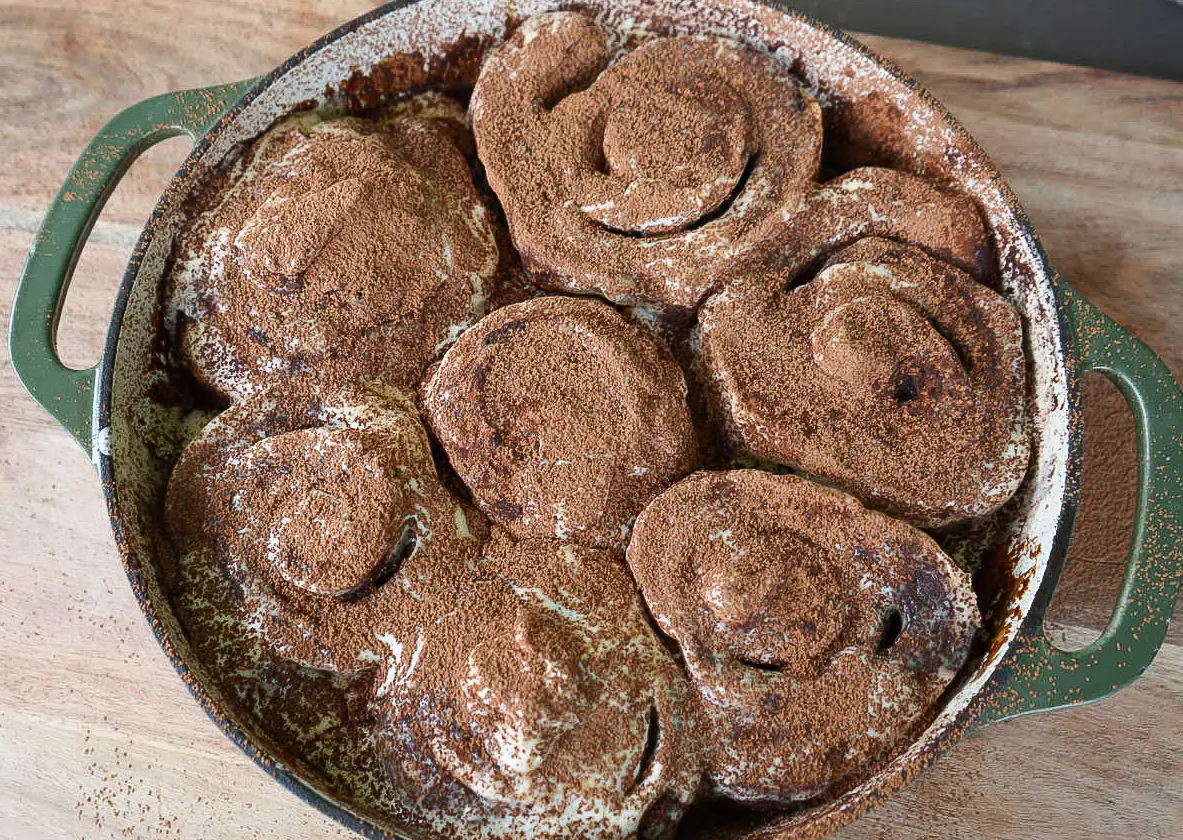
Sourdough cinnamon raisin bread, Cheesy sourdough pull-apart bread, Sourdough focaccia bread.
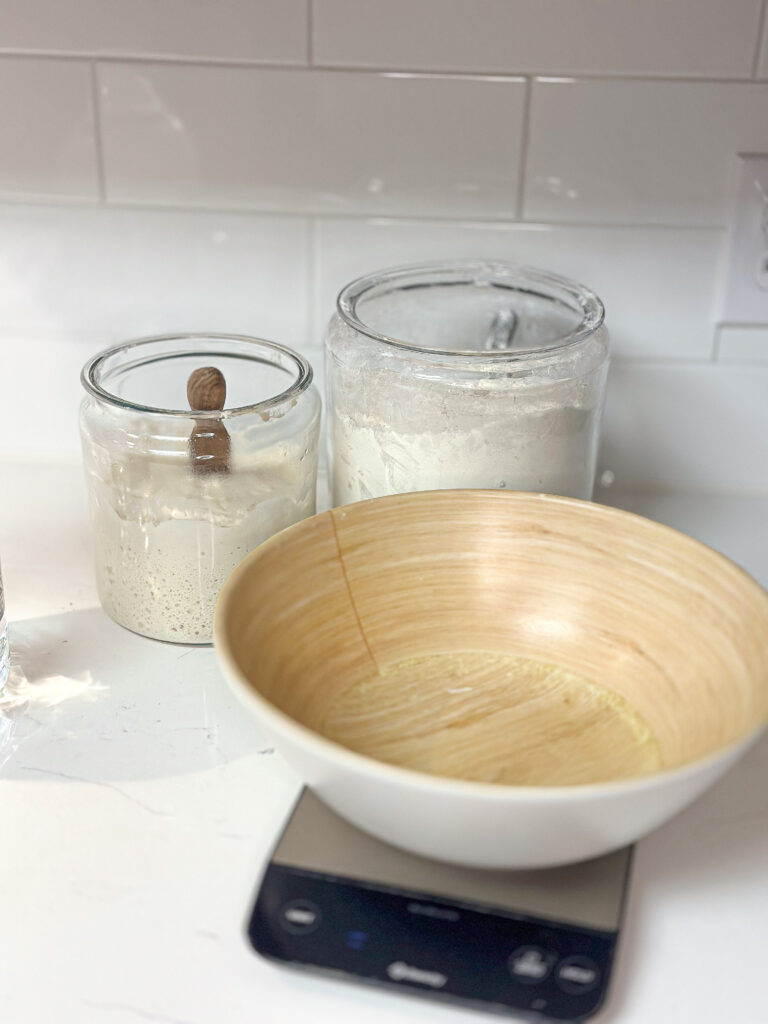
- 100 grams of leavened sourdough starter
- 400 grams of warm filtered water- room temperature water
- 500 grams of bread flour
- 10 grams salt
- 30 grams of chia seeds
WHAT KIND OF FLOUR IS BEST TO USE?
It’s important to note that the type of flour used can affect the outcome of this sourdough chia seed bread, but regardless of the flour you choose, it will still be delicious. Having tried several types of flour, I now tend to use whatever type I have on hand. I’ve experimented with all-purpose flour, einkorn, and whole wheat flour. However, I highly recommend using organic, unbleached bread flour to achieve the best possible result.
Can you use different kinds of seeds?
Absolutely! You can use a combination of different kinds of seeds. You can even roll the dough in seeds after the final shaping before you put it into the banneton basket. Here are some examples:
- poppy seeds
- flax seeds
- hemp seeds
- pumpkin seeds
- sesame seeds
- sunflower seeds

Baking sourdough bread is a beloved tradition in our household. We make this bread at least once weekly; my kids can’t get enough of it! They always ask me to bake this delightful bread. We love to pair it with soups and sandwiches, and my kids’ favorite way to enjoy it is with butter and jam while it’s still warm and fresh from the oven.
As I mix and fold sourdough bread, I am reminded of the countless mothers before me who created bread to nourish their own families. Making fresh, homemade sourdough bread with my
hands for my loved ones is truly a special and inspiring experience.
PRO TIPS FOR A GOOD LOAF OF BREAD:
These tips I bring to you after some trial and error. I made the mistakes, so you don’t have to!
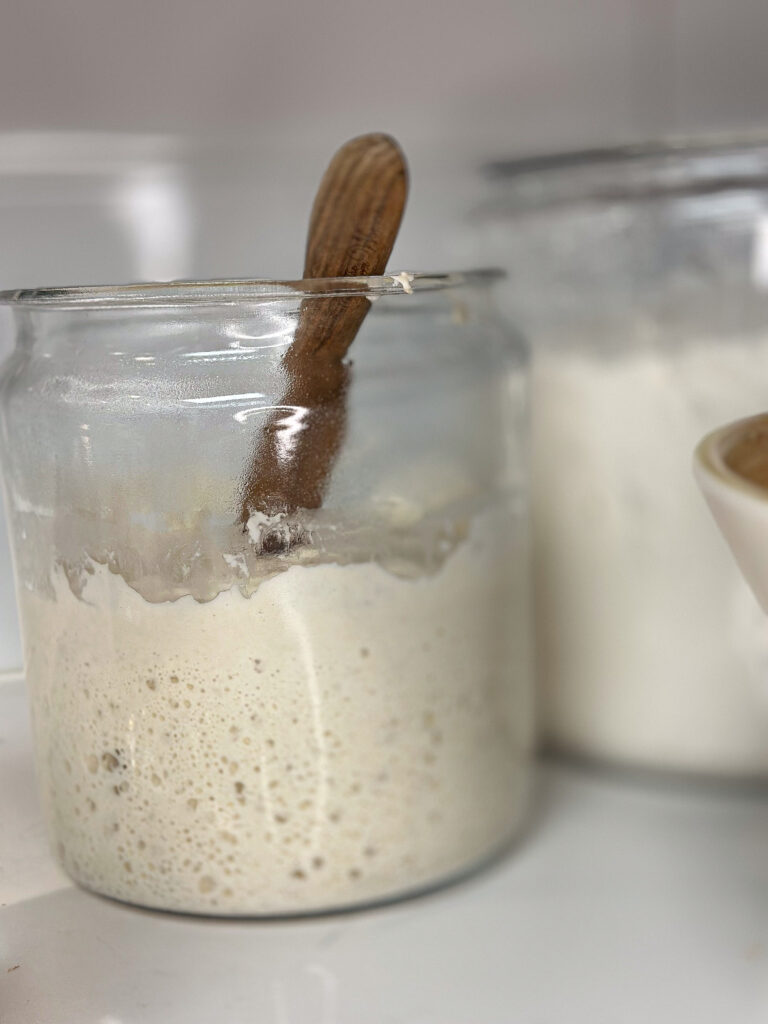
- First- the most essential tip is to use an active sourdough starter (bubbly). If you are not using a starter you fed 4-12 hours prior, This will not work. It’s best to use a starter while it is at its peak! (meaning, feed your starter water and flour. Give it a good mix, then leave it on your countertop until it doubles in size)
- Pay attention to your sourdough in between each stretch and fold. If it looks like it isn’t fermenting, with no visible bubbles in the dough, let it sit at room temperature a little longer before you do your next stretch and fold.
- Do not dissolve salt, water, and the sourdough starter at the same time before you add the flour. When the salt and the sourdough starter hit the water simultaneously, the sourdough turns into a rubbery consistency that doesn’t dissolve.
- My second tip is don’t mix your sourdough starter with too much water. When your sourdough starter has too much water, the starter will become foamy on top and might not get the best rise. I have baked with it in the past anyway, and it makes your bread flatter than usual. A good ratio for a sourdough starter would be, 50g sourdough starter, 100g water, and 100g flour.
This recipe is based on you having an active starter that you have fed a few hours before starting your bake. Learn how to make a sourdough starter from scratch here.
BREAD MAKING TOOLS
Sourdough bread has been made for thousands of years without any modern tools. However, some equipment is available to make this process a little easier.
- Food scale- There is one tool that, in my opinion, is necessary: a food weight scale. When it comes to baking sourdough bread, precision is key! There’s no better way to measure accuracy than using a digital food scale.
- Banneton-proofing baskets and a scoring tool are excellent to have but are not necessary.
- Jar- A good jar to grow your sourdough starter is also important!
- Dutch oven- Last but not least, you will need a Dutch oven. A Dutch oven helps the bread to get the delicious crunchy crust that sourdough bread is famous for. Without a Dutch oven, it will be hard to achieve this. Ok! Now that you have all your tools, let’s start to bake!
- lame– for scoring the loaf
YOU WILL NEED A LEAVENED SOURDOUGH STARTER TO BAKE SOURDOUGH CHIA SEED BREAD
Sourdough bread consists of a few basic ingredients you already have in your pantry! Flour, water, salt, chia seeds, and LEAVENED sourdough starter. First of all, you will need a good sourdough starter. As I mentioned, a starter is your rising component in bread making. Without this, your bread will NOT rise.
Pin it for later!

HOW TO MAKE SOURDOUGH CHIA SEED BREAD
STEP 1: Place a large mixing bowl on a food scale, zero it out then add 400 grams of warm water and 100 grams of leavened sourdough starter, take it off the food scale then give it a mix using a dough whisk. Place the bowl back on the scale, zero it out then add 500 grams of bread flour, 10 grams of salt, and 30 grams of chia seeds.
Wash your hands and give this a good mix. You don’t want to knead the dough, you want to combine all the ingredients till there are no dry streaks of flour. The dough will be very sticky and almost liquid in consistency. You might be tempted to add more flour. But trust the process! Do not add more flour than what the recipe is asking for.
After a good mix, close the bowl with these reusable shower caps, and let the dough rest for 1 hour.
(Cover the dough with saran wrap, a tea towel, or a lid for this step. You don’t want a tight seal on the sourdough. You still want some air to circulate into the dough, to help ferment it. Yet you don’t want the dough to develop a hard crust either)
STEP 2: Wet your hands to keep the sourdough from sticking to your hands while doing the next step.
Now, you will perform coil folds on the sourdough. Gluten relaxes over time; this step will help build up the gluten and give it strength and shape. Which will result in a beautiful rise when baking.
How To Coil Fold Sourdough?
Sourdough coil folds are a folding technique used to develop the gluten gently. Coil folds are more likely to be performed in higher hydration doughs.
Here’s how to perform a coil fold:
- To make a coil fold in your dough, gently lift the fermenting dough with both hands from the middle until one end releases from the mixing bowl
- Allow the dough to fall using its weight while you support the middle.
- Gently lower the dough to allow the loosened end to tuck under the middle, and repeat with the other side. The dough should now look like it is coiled over itself.
- Once you have performed a coil fold on all sides of the sourdough, cover it and then rest for 45 minutes.
Repeat the coil folds 3 times with 45 minutes in between each one.
STEP 3: Gently take out the bread dough on a clean countertop. Do not dust any flour on the countertop. Cover the dough with a tea towel and rest for 10 minutes. This step will ensure that your dough relaxes, then it will be easier to stretch it for the next step.

After allowing the dough to rest, stretch the sourdough out with your hands on a clean countertop.

Wetting your hands during this step is unnecessary, and while the dough may feel a little sticky, avoid adding any extra flour. If the sourdough is too sticky to handle, you can use your bench scraper to assist you.
Next, take one side of the sourdough and fold it over to the center, then fold over the opposite side. Once the two sides are folded, roll the dough into a ball. Then, seal the ends. Tuck the ends underneath the dough to form a ball. After the sourdough is formed into a ball, twist the dough on the table to create tension on the bottom. This helps to close up any open holes.

Now that your sourdough is shaped into a ball- lightly flour your proofing basket (if you are not using proofing baskets, then take a bowl and line it with a tea towel). Flip the dough ball with the bottom facing up into your basket or bowl. Pinch to seal any holes. Dust the Sourdough ball with a little bit of flour, then cover it with plastic wrap or tie it inside a plastic bag so air doesn’t get inside. Place in the fridge for overnight fermentation for 12-24 hours.

An unbaked loaf can be stored in the fridge for a week. The longer it ferments in the fridge, the more “sourdough” flavor will come through.
TIME TO BAKE YOUR SOURDOUGH BREAD
STEP 4: This is the most exciting part! It’s baking day! Place a Dutch oven into the oven with the lid closed and preheat the oven to 500F. While your oven is preheating (with the Dutch oven inside), remove your loaf from the fridge and gently flip your dough onto parchment paper.
This is the time to score your bread! When the sourdough bread is baking in the oven, it rises to almost double its size (an oven spring), and if you don’t score it, you will have random cracks throughout the loaf. Scoring gives you control over where you want the bread to expand. Also, you can make it look pretty, have fun with it!

Take out the Dutch oven from the oven; be careful a preheated Dutch is very hot! Use oven mitts for your safety. Place the sourdough chia seed bread into the Dutch oven with the parchment paper, and bake for 30 minutes at 500F with the lid closed on the Dutch oven. After 30 minutes, remove the lid from the Dutch oven, lower your heat to 450F, and bake for 3-10 minutes or until golden brown.

Take your sourdough chia seed bread out of the oven and place it on a cooling rack for two hours before you slice into it. I know it’s tempting, but it is worth the wait. Most of the time, we are impatient and cut into it immediately and end up waiting anyway because it’s too hot to eat. Listening to the lovely crackle when I take the chia sourdough bread out of the oven is one of my favorite things.

Enjoy! I hope your household will become as obsessed as we are with sourdough bread! Your family members will be begging for a fresh loaf weekly 😉

Ingredients
Equipment
Method
- STEP 1: Place a large mixing bowl on a food scale, zero it out then add 400 grams of warm water and 100 grams of leavened sourdough starter, take it off the food scale then give it a mix using a dough whisk. Place the bowl back on the scale, zero it out then add 500 grams of bread flour, 10 grams of salt, and 30 grams of chia seeds. Wash your hands and give this a good mix. You don’t want to knead the dough, you want to combine all the ingredients together till there are no dry streaks of flour. The dough will be very sticky and shaggy. You might be tempted to add more flour. But trust the process! Do not add more flour than what the recipe is asking for.After a good mix, close the bowl with these reusable shower caps, and let the dough rest for 1 hour. (Cover the dough with saran wrap, a tea towel, or a lid for this step. You don’t want a tight seal on the sourdough. You still want some air to circulate into the dough, to help ferment it. Yet you don’t want the dough to develop a hard crust either)
- STEP 2: Wet your hands to keep the sourdough from sticking to your hands while doing the next step.Now, you will perform coil folds on the sourdough. Gluten relaxes over time; this step will help build up the gluten and give it strength and shape, which will result in a beautiful rise when baking.REPEAT THE COIL FOLDS 3 TIMES WITH 45 MINUTES IN BETWEEN EACH ONE.
- STEP 3: Gently take out the bread dough on a clean countertop. Do not dust any flour on the countertop. Cover the dough with a tea towel and rest for 10 minutes. This step will ensure that your dough relaxes, then it will be easier to stretch it for the next step.After allowing the dough to rest, stretch the sourdough out with your hands on a clean countertop. Wetting your hands during this step is unnecessary, and while the dough may feel a little sticky, avoid adding any extra flour. If the sourdough is too sticky to handle, you can use your bench scraper to assist you. Next, take one side of the sourdough and fold it over to the center, then fold over the opposite side. Once the two sides are folded, roll the dough into a ball. Then, seal the ends. Tuck the ends underneath the dough to form a ball. After the sourdough is formed into a ball, twist the dough on the table to create tension on the bottom. This helps to close up any open holes.Now that your sourdough is shaped into a ball- lightly flour your proofing basket (if you are not using proofing baskets, then take a bowl and line it with a tea towel). Flip the dough ball with the bottom facing up into your basket or bowl. Pinch to seal any holes. Dust the Sourdough ball with a little bit of flour, then cover it with plastic wrap or tie it inside a plastic bag so air doesn’t get inside. Place in the fridge for overnight fermentation for 12-24 hours. An unbaked loaf can be stored in the fridge for a week. The longer it ferments in the fridge, the more “sourdough” flavor will come through.
- STEP 4: This is the most exciting part! It’s baking day! Place a Dutch oven into the oven with the lid closed and preheat the oven to 500F. While your oven is preheating (with the Dutch oven inside), remove your loaf from the fridge and gently flip your dough onto parchment paper.This is the time to score your bread! When the sourdough bread is baking in the oven, it rises to almost double its size (an oven spring), and if you don’t score it, you will have random cracks throughout the loaf. Scoring gives you control over where you want the bread to expand. Also, you can make it look pretty, have fun with it!Take out the Dutch oven from the oven; be careful a preheated Dutch is very hot! Use oven mitts for your safety. Place the sourdough chia seed bread into the Dutch oven with the parchment paper, and bake for 30 minutes at 500F with the lid closed on the Dutch oven. After 30 minutes, remove the lid from the Dutch oven, lower your heat to 450F, and bake for 3-10 minutes or until golden brown. Take your sourdough chia seed bread out of the oven and place it on a cooling rack for two hours before you slice into it. I know it’s tempting, but it is worth the wait. Most of the time, we are impatient and cut into it immediately and end up waiting anyway because it’s too hot to eat.
Notes
YOU WILL NEED A LEAVENED SOURDOUGH STARTER TO BAKE SOURDOUGH CHIA SEED BREAD
PRO TIPS FOR A GOOD LOAF OF BREAD:
These tips I bring to you after some trial and error. I made the mistakes, so you don’t have to!- First- the most essential tip is to use an active sourdough starter (bubbly). If you are not using a starter you fed 4-12 hours prior, This will not work. It’s best to use a starter while it is at its peak! (meaning, feed your starter water and flour. Give it a good mix, then leave it on your countertop until it doubles in size)
- Pay attention to your sourdough in between each stretch and fold. If it looks like it isn’t fermenting, with no visible bubbles in the dough, let it sit at room temperature a little longer before you do your next stretch and fold.
- Do not dissolve salt, water, and the sourdough starter at the same time before you add the flour. When the salt and the sourdough starter hit the water simultaneously, the sourdough turns into a rubbery consistency that doesn’t dissolve.
- My second tip is don’t mix your sourdough starter with too much water. When your sourdough starter has too much water, the starter will become foamy on top and might not get the best rise. I have baked with it in the past anyway, and it makes your bread flatter than usual. A good ratio for a sourdough starter would be, 50g sourdough starter, 100g water, and 100g flour.


Reader Interactions