Responsive Menu
Add more content here...
Search

SOURDOUGH CINNAMON ROLLS

Jump to Recipe

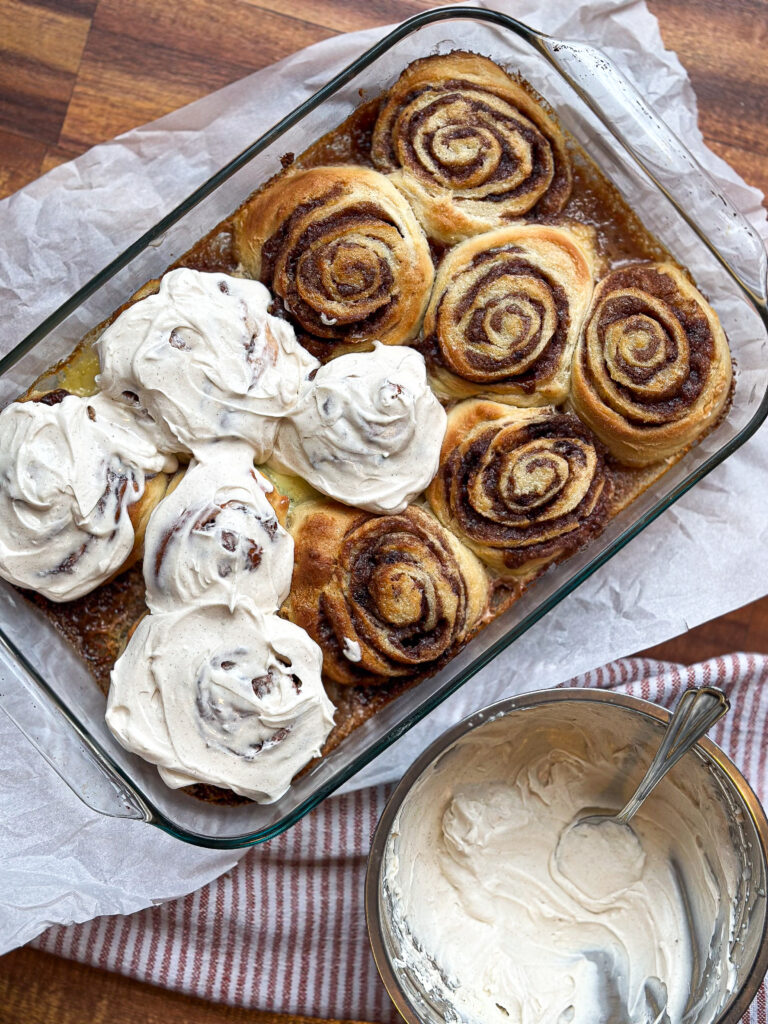
Are you looking for the perfect cinnamon roll recipe? Look no further. This sourdough cinnamon roll recipe is all you need. Soft rolls made with layers of cinnamon sugar, baked until golden brown then topped with mascarpone cheese icing. The fermentation process gives the cinnamon buns a greater depth of flavor for the perfect balance of sweet, sour, and soft. Trust me, you don’t want to miss this delicious breakfast treat. Give this recipe a try and enjoy the ultimate cinnamon roll experience.
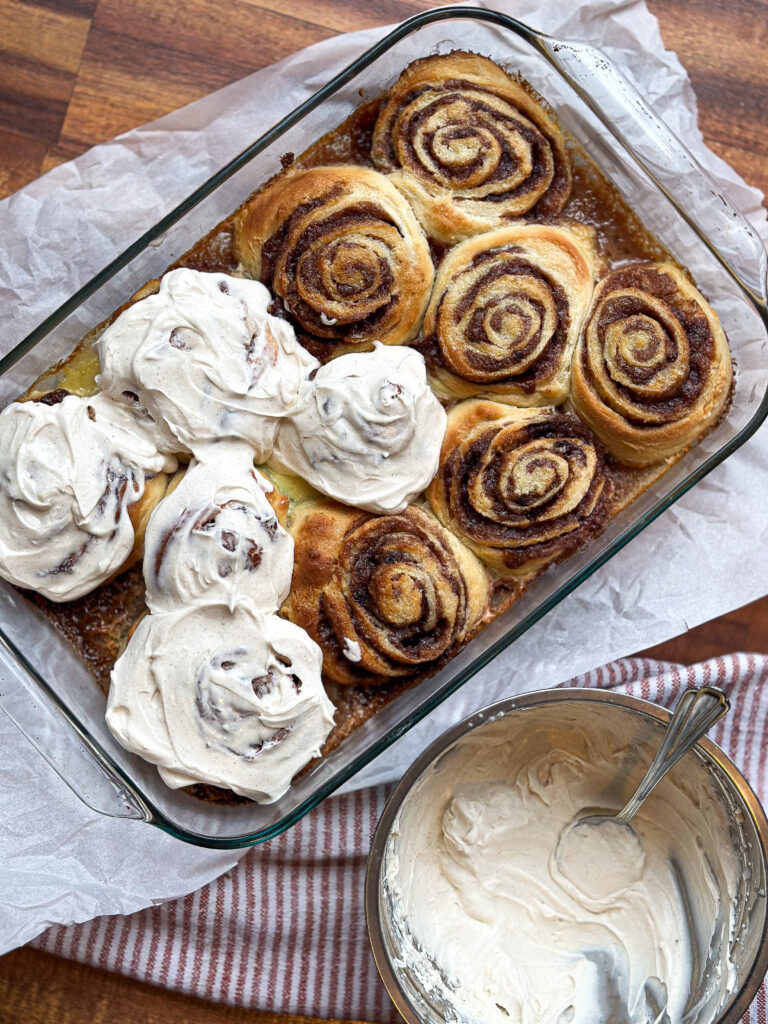
“Oh boy, let me tell you about these fantastic sourdough cinnamon rolls! I’ve made them so many times until I got the recipe just right – and let me tell you, it was worth it! The rolls are so delicious that I could make them repeatedly without getting tired of them. I over-fermented the dough once, but surprisingly, it was still delicious!”
AS AN AMAZON ASSOCIATE, THIS POST MAY CONTAIN AFFILIATE LINKS. THIS WILL NOT CHANGE YOUR PRICE BUT WILL SHARE SOME COMMISSION WITH OUR FAMILY.

Have you ever tried making overnight sourdough cinnamon rolls? The plan is to ensure proper fermentation of all the grains with the starter to make them delicious. Sourdough uses wild yeast and bacteria to rise, not baker’s yeast. It’s healthier, easier to digest, and has less gluten. This dough comes out to be perfectly tangy and very soft! I think I’ve finally found a recipe that does the job perfectly! Can’t wait to share it with you!” 

If you love sourdough, check out my other recipes, which I’m sure you will love! Such as sourdough cinnamon raisin bread, easy sourdough bread recipe, and sourdough discarded chocolate chips. If you are new to sourdough and don’t know where to start, This easy guide on how to grow a sourdough starter would be a great start! 

Why You Will Love This Recipe:

  • These cinnamon buns are fluffy with layers of cinnamon sugar butter and soft sourdough dough. 
  • A lot of the work for these breakfast treats is done the night before, so you don’t have to wait hours for them to rise the next day. This makes them perfect for Christmas morning, any holiday, or even a lazy weekend. You won’t have to wake up at 5 am to get them ready for the second rise. Since it needs to ferment overnight, I have created this baker’s schedule to make it easier for you.
  • These sourdough cinnamon rolls are fermented overnight, making them more digestible for gluten-intolerant people.
  • Because the dough ferments, it has a tangy flavor, which combines perfectly with the brown sugar and cinnamon.
  • This recipe has the most delicious frosting made with mascarpone cheese, adding the perfect topping to the perfect sourdough cinnamon roll!
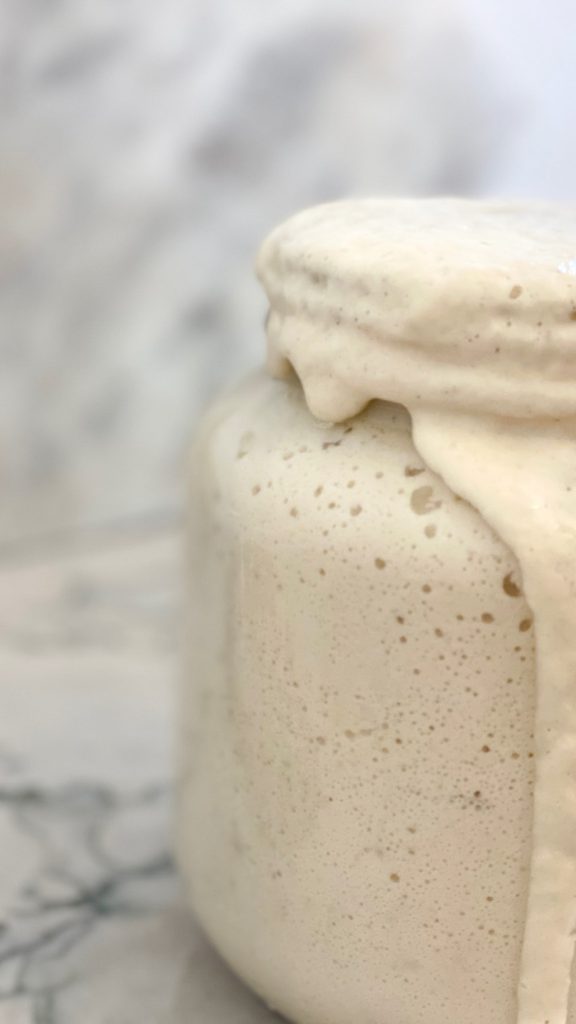
leavened sourdough starter in a clear jar

​Bakers schedule

3:00 pm- feed your sourdough starter: This recipe is based on you having an active starter that you have fed a few hours before starting your bake.

8:00 pm- mix the dough

The next day, 8:00 am- roll, shape, rise then bake!

Accidentally over-fermented the sourdough cinnamon rolls?

“I must admit, I’ve done that before! Once, I mixed the dough and completely forgot about it for 24 hours. The dough was well-fermented, but I still made delicious sourdough cinnamon rolls out of it. However, rolling out the dough was a bit tricky. I dusted the countertop with flour to prevent sticking and gently rolled the dough out. I also used a bench scraper to help roll the sourdough cinnamon rolls into a log.”

Tools you will need 

Dough:

This recipe was updated on Sep 21 2024

  • 1/2 cup active and bubbly sourdough starter 
  • 1 egg
  • 3/4 cup milk
  • 1/2 cup melted butter- cooled ( 8 tablespoons)
  • 1 teaspoon salt
  • 2 tablespoons sugar or honey
  • 3 cups unbleached all-purpose flour- I do not recommend using bread flour

Frosting:

  • 4 oz softened cream cheese
  • 4 oz mascarpone cheese
  • 1/4 cup milk or heavy whipping cream
  • 1/4 cup powdered sugar
  • 1 teaspoon cinnamon 

Filling:

  • 1/2 cup softened butter
  • 1/2 cup brown sugar
  • 1 1/2 tablespoons cinnamon
  • 1/3 cup heavy cream – to drizzle on the rolls before baking

Why did my cinnamon rolls come out dry?

  1. Tough cinnamon rolls often turn out dense due to adding too much flour to the dough. The dough should be soft and slightly sticky. You might be tempted to add more flour, but trust the process! 
  2. Another reason why your cinnamon rolls were tough, is maybe the dough hadn’t had enough time to ferment correctly. Every fermentation time may look different depending on the temperature of your home. The warmer your home is, the quicker the dough will ferment.
  3. Did you use bread flour? I recommend using all-purpose flour. Bread flour has a higher protein in it versus all purpose flour, creating a more gentle and airy sourdough cinnamon rolls.

How to make easy sourdough cinnamon rolls 

step 1: Make The Dough

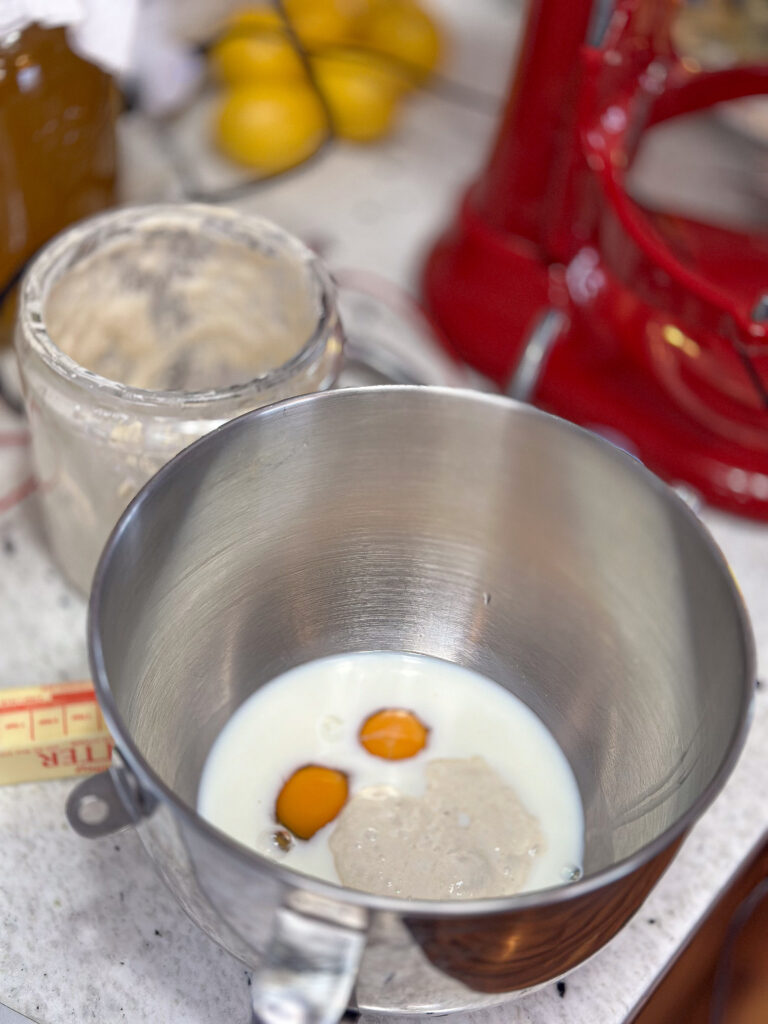
To make the dough, start by combining active sourdough starter, sugar, milk, egg, and melted butter in the bowl of a stand mixer. Mix the ingredients until they combine.

a mixing bowl from the stand mixer is on a granite countertop with liquid ingredients to make sourdough cinnamon rolls.

After that, attach the dough hook to the stand mixer and gradually add in the flour and salt. Knead the dough for 5-10 minutes on medium-low speed until it becomes smooth and the dough pulls away from the sides of the bowl. To check if the dough is ready, perform the windowpane test. This step is important as it helps to develop the gluten strands.

dough in a metal mixing bowl with a dough hook for sourdough cinnamon rolls

What is the window pane test?

To properly check if the dough is ready, pinch it with your thumb and pointer finger, then stretch it up. If it breaks apart, the gluten strands haven’t developed enough, and you must keep mixing it. It is ready if the dough can be stretched to almost see-through.

Step 2: Cover And Ferment

Place the dough in a lightly oiled bowl and cover the dough with a shower cap or plastic wrap. Something tight fitting.

Allow to ferment in a warm spot (countertop)  overnight for 8-12 hours for bulk fermentation. During this time, keep an eye on it; as soon as it doubles in size, it is ready to use. This can be quicker than 8-12 hours or longer. It depends on how cold or warm your house is. 

Step 2: The Next Morning

Step 3: Make The Filling And Roll The Cinnamon Roll

In a small bowl, combine unsalted butter, brown sugar, cinnamon, and flour. 

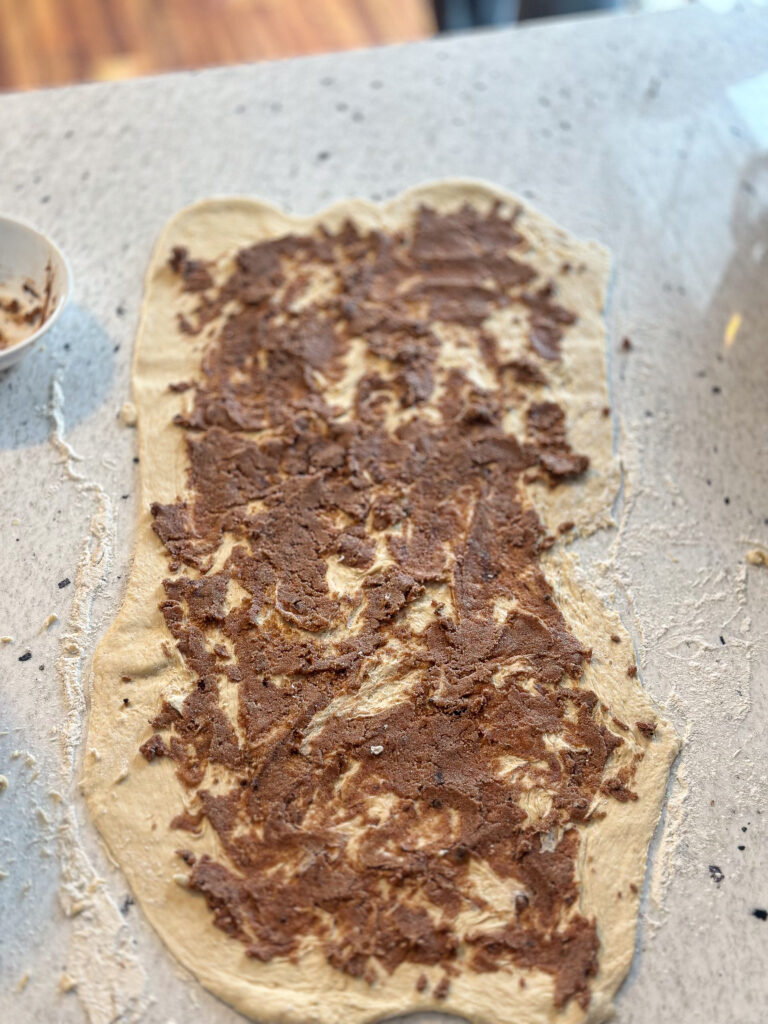
sourdough cinnamon rolls dough rolled out into a rectangle with butter, sugar, and cinnamon filling spread-out on it.

Now, roll the dough into a rectangle on a lightly floured surface. Roll out the dough to about 1/4 inch thick using a floured rolling pin. Spread the filling evenly over the dough. Roll the dough into a firm log and pinch the seam to seal. ( use a bench scraper to help roll the sourdough cinnamon dough into a log)

Step 4: Slice, Roll, Rise, And Bake

Slice the cinnamon roll log into even rolls. I like using a sewing thread or dental floss for super neat rolls! But you can use a sharp knife to make even cuts. 

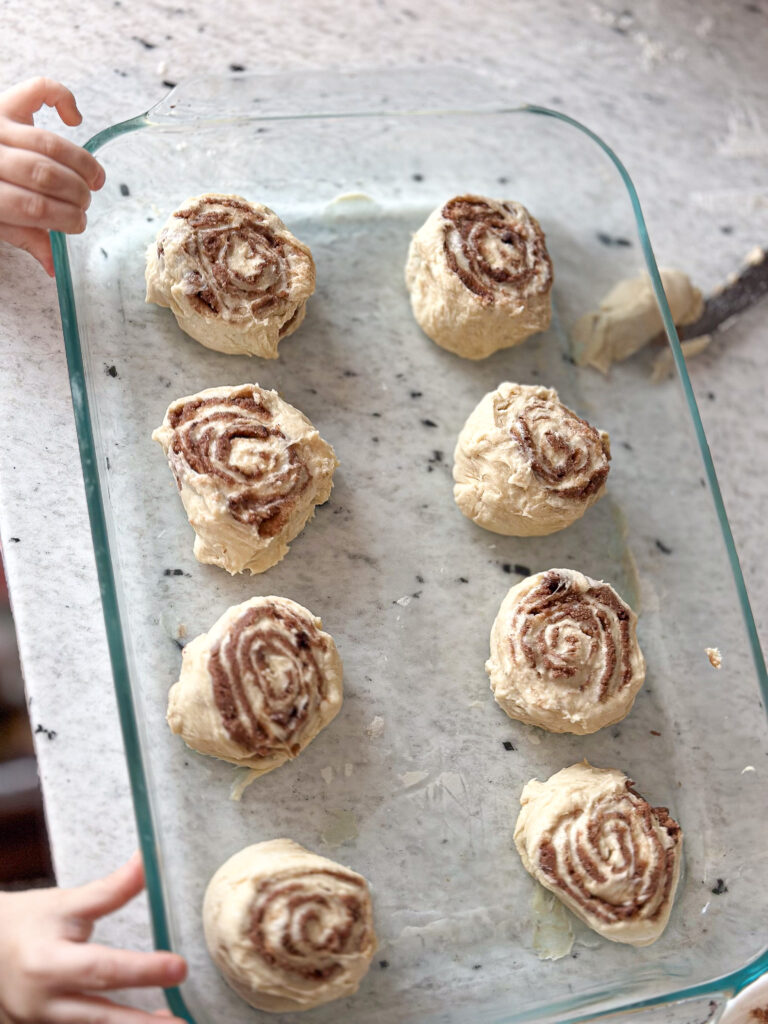
I like to start by making a slice in the middle, and then I cut each half into 4, making 8 total rolls.

Place the unbaked rolls in a greased 9×13 baking dish. Allow them to rise till they double in size. (To make them without the second rise view notes below)

Bake them in a 350-degree oven for 30 minutes or until the sourdough cinnamon buns are lightly browned and the dough is cooked through. Allow them to cool a bit before frosting.

How To Make The Frosting

Using a hand mixer, beat the cream cheese until it is smooth without lumps. Then add the mascarpone cheese and combine; lastly, add the milk, powdered sugar, and cinnamon. 

Frost the fluffy sourdough cinnamon rolls while they are warm in the pan! Enjoy!

If you liked this recipe, please leave me a comment and a star rating. 

How to make the sourdough cinnamon rolls without the second rise!

  • 1 teaspoon baking soda
  • 1 teaspoon baking powder

 Add baking soda and baking powder to the fermented dough and knead for about 5 minutes in the stand mixture using the dough hook until all the ingredients are well incorporated.

Roll the dough into a rectangle, spread the filling, roll the dough into a log, make even cuts, place the rolls into a baking dish, and bake. The baking soda and baking powder will make the dough rise while baking.

Sourdough cinnamon rolls

This sourdough cinnamon roll recipe is all you need. Soft rolls made with layers of cinnamon sugar, baked until golden brown, gooey, and topped with mascarpone cheese icing. The fermentation process gives the cinnamon buns a greater depth of flavor for the perfect balance of sweet, sour, and soft. 
5 from 2 votes
Prep Time 20 minutes
Cook Time 30 minutes
12 hours
Total Time 12 hours 50 minutes
Course Breakfast
Cuisine American
Servings 12 people

Equipment

  • stand mixer
  • measurig cups
  • baking tray
  • Saran wrap

Ingredients
  

DOUGH:

  • 1/2 cup active and bubbly sourdough starter
  • 1 egg
  • 3/4 cup milk
  • 1/2 cup melted butter ( 8 tablespoons)
  • 1 tsp salt
  • 2 tbl sugar or honey
  • 3 cups unbleached all-purpose flour- I do not recommend using bread flour

FROSTING:

  • 4 oz softened cream cheese
  • 4 oz mascarpone cheese
  • 1/4 cup milk or heavy whipping cream
  • 1/4 cup powdered sugar
  • 1 tsp cinnamon

FILLING:

  • 1/2 cup  softened butter
  • 1/2 cup brown sugar
  • 2 1/2 tbl cinnamon
  • 1 tbl flour
  • 1/3 cup heavy cream- to drizzle over the rolls befoee baking

Instructions
 

  • MAKE THE DOUGH
    To make the dough, start by combining active sourdough starter, sugar, milk, eggs, and melted butter in the bowl of a stand mixer. Mix the ingredients until they combine.
    After that, attach the dough hook to the stand mixer and gradually add in the flour and salt. Knead the dough for 10 minutes on medium-low speed until it becomes smooth and the dough pulls away from the sides of the bowl. To check if the dough is ready, perform the windowpane test. This step is important as it helps to develop the gluten strands.
  • COVER AND FERMENT
    Place the dough in a lightly oiled bowl and cover the dough with a shower cap or plastic wrap. Something tight fitting.
    Allow to ferment in a warm spot (countertop)  overnight for 8-12 hours for bulk fermentation. During this time, keep an eye on it; as soon as it doubles in size, it is ready to use. This can be quicker than 8-12 hours or longer. It depends on how cold or warm your house is. 
  • THE NEST DAY: MAKE THE FILLING AND ROLL THE CINNAMON ROLL
    In a small bowl, combine unsalted butter, brown sugar, and cinnamon
    Now, roll the dough into a rectangle on a lightly floured surface. Roll out the dough to about 1/4 inch thick using a floured rolling pin. Spread the filling evenly over the dough. Roll the dough into a firm log and pinch the seam to seal. ( use a bench scraper to help roll the sourdough cinnamon dough into a log)
  • SLICE, ROLL, RISE, AND BAKE
    Slice the cinnamon roll log into even rolls. I like using a sewing thread or dental floss for super neat rolls! But you can use a sharp knife to make even cuts. 
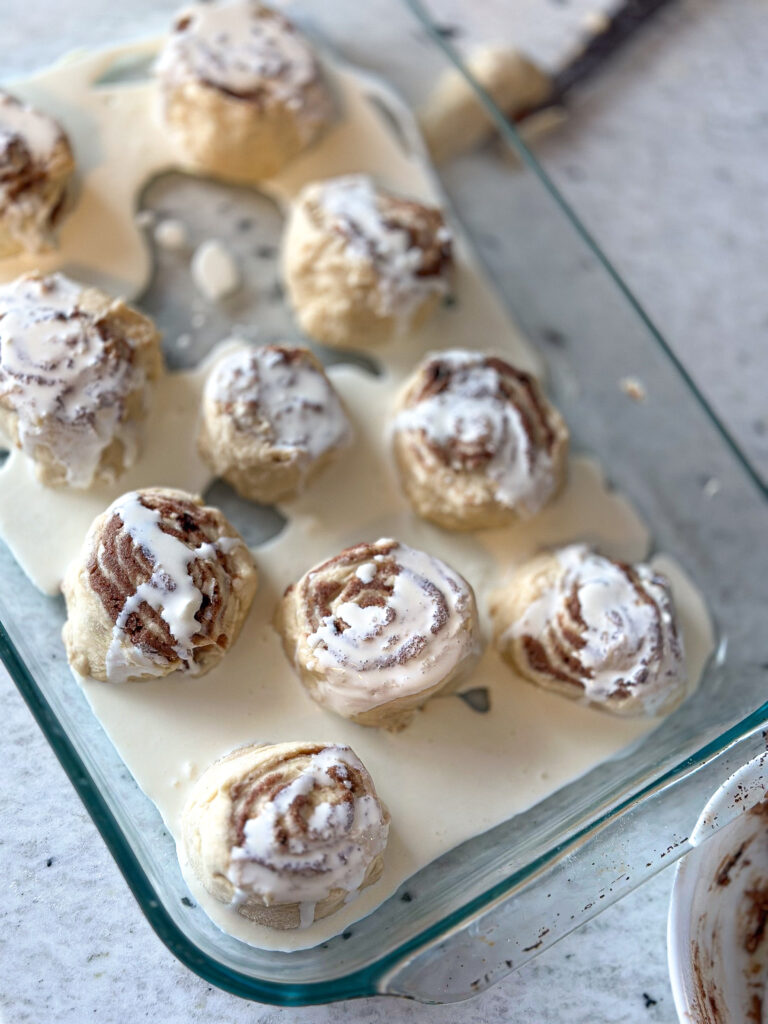
    I like to start by making a slice in the middle, and then I cut each half into 4, making 8 total rolls .Rise them for 2 hours or until they double in size.
    Place the unbaked rolls in a greased 9×13 baking dish. 
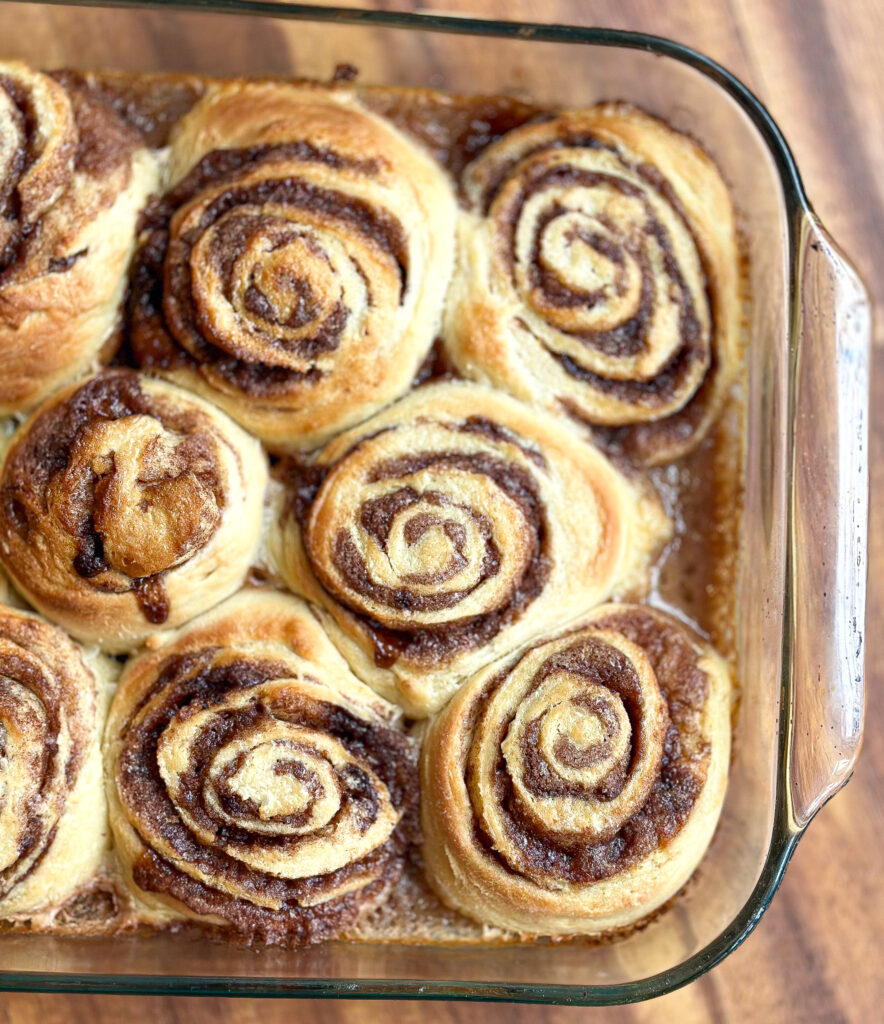
    Bake them in a 350-degree oven for 30 minutes or until the sourdough cinnamon buns are lightly browned and the dough is cooked through. Allow them to cool a bit before frosting.
  • MAKE THE FROSTING
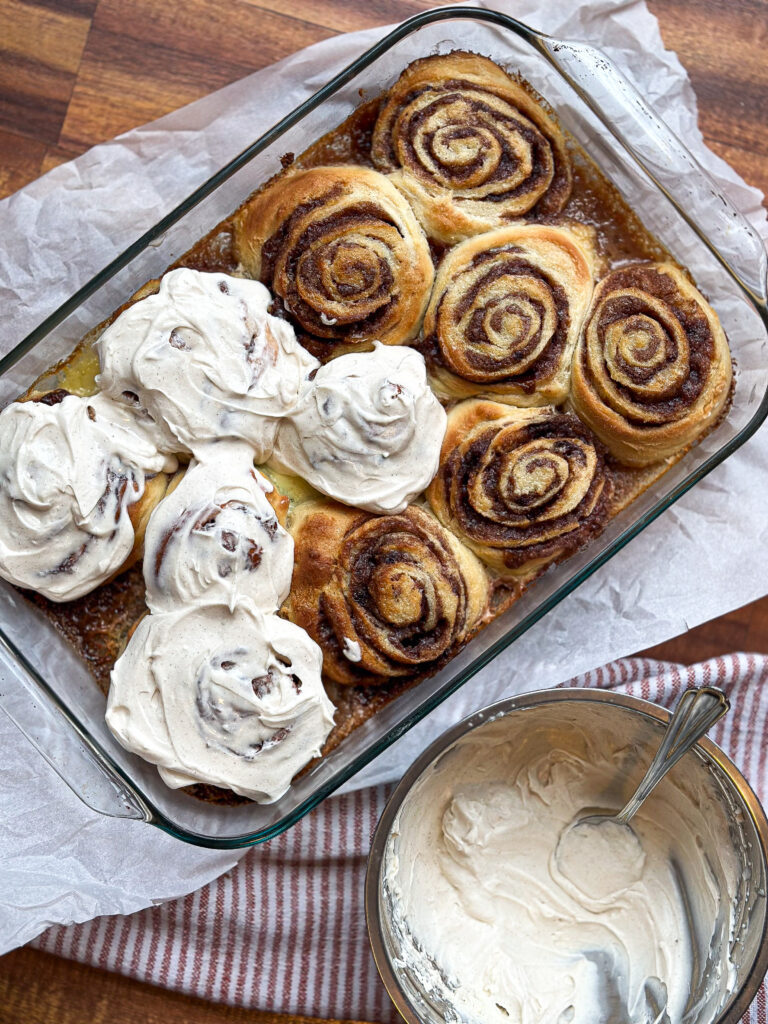
    Using a hand mixer, beat the cream cheese until it is smooth without lumps. Then add the mascarpone cheese and combine; lastly, add the milk, powdered sugar, and cinnamon. 
    Frost the fluffy sourdough cinnamon rolls while they are warm in the pan! Enjoy!
Keyword sourdough cinnamon rolls, sourdugh, sourduogh recipe

How To Store

Unfrosted cinnamon rolls can be stored at room temperature for 2-3 days when covered. Frosted cinnamon rolls should be kept in the refrigerator for up to 4 days. 

How To Make Sourdough Cinnamon Rolls Ahead Of Time

Prepare the dough following the instructions provided. Cut it into pieces and immediately arrange them in a baking dish without adding the cream. Cover the dish with plastic wrap and store it in the refrigerator for up to 12 hours or in the freezer. However, be careful not to leave the buns in the refrigerator for too long, as they may become over-proofed.

Allow to rest on the counter for 2 hours before baking if refrigerated, and overnight if making them from the freezer.

Pour the cream over the sourdough cinnamon rolls, then bake them according to directions.

Serving suggestions

We love these by themselves, but they do go perfectly with:

 A cup of bone broth hot chocolate

sourdough breakfast strata

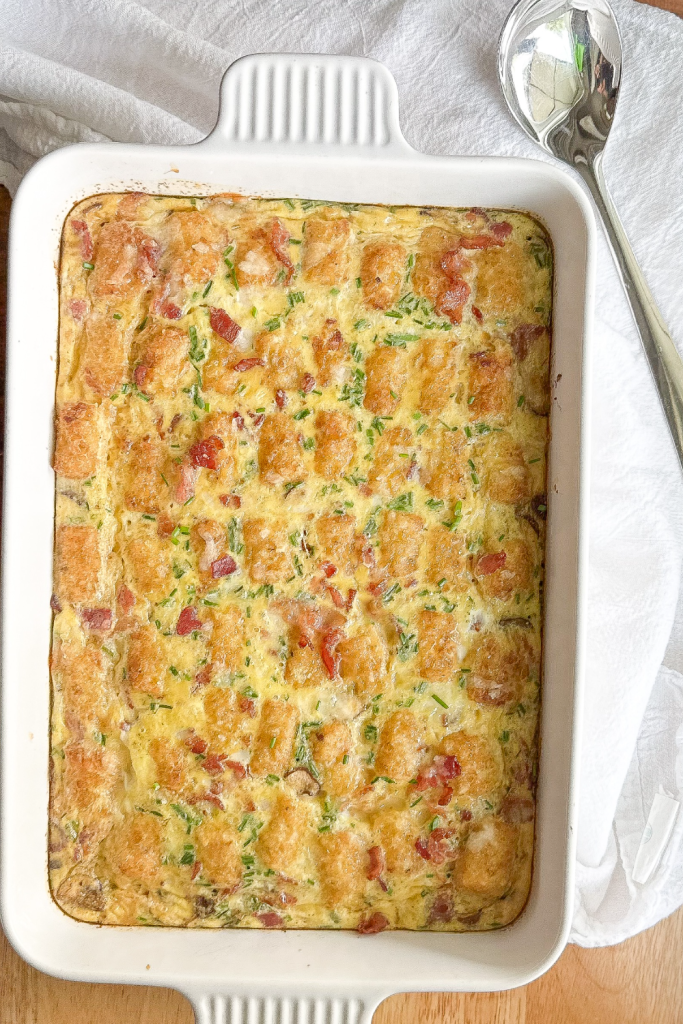
 Bacon and egg tater to casserole.

More homemade baked goods

Why are sourdough cinnamon rolls healthier than yeast cinnamon rolls?

A sourdough starter consists of 3 things. Flour, water, and organisms. The sourdough dough is made by fermentation, and it’s naturally leavened, so it doesn’t use commercial yeast to rise. Instead, it uses a ‘starter’ – a fermented flour and water mixture that contains wild yeast and good bacteria – to rise.

Sourdough bread has a unique tangy flavor and slightly chewy texture. This is because it is made with wild yeast, which has more flavor than commercial yeast. Sourdough is considered natural because it doesn’t contain any additives. Additionally, the fermentation process involved in making sourdough helps to break down anti-nutrients, making it easier for our body to absorb the nutrients.

Due to fermentation, sourdough bread contains probiotics, which makes it more easily digestible and fiber-rich. This promotes better digestion and a healthier gut.

Share:

Facebook
Twitter
Pinterest

Reader Interactions

Leave a Reply

Your email address will not be published. Required fields are marked *

Recipe Rating


Table of Contents

On Key

Related Posts

sourdough cinnamon pumpkin focaccia

Pumpkin season is here! And that means cue fall recipes 🙂 This sourdough cinnamon pumpkin focaccia bread makes the most delicious breakfast or dessert. It is flavored with pumpkin, cinnamon, and brown sugar! It has an irresistible crispy crust caramelized by butter and brown sugar, yet it is fluffy and airy inside with a hint of pumpkin. This makes it the perfect fall treat your whole family will love!  AS AN AMAZON ASSOCIATE, THIS POST MAY CONTAIN SOME AFFILIATE LINKS. THIS DOES NOT CHANGE YOUR PRICE. BUT IT DOES SHARE A SMALL COMMISSION WITH OUR FAMILY. READ THE FULL DISCLOSURE HERE Even though making sourdough cinnamon pumpkin focaccia may seem intimidating, it’s not hard to do. There are only about 20 minutes of actual hands-on work and most of the time; the bread is rising! I will walk you through achieving the perfect sourdough cinnamon pumpkin focaccia bread! Tools you will need to make sourdough focaccia bread Pin it for later! Ingredients for sourdough cinnamon pumpkin Foccacia Dough Toppings Cream cheese frosting Whip up a batch of dough the day before; the next day, it will be ready to bake for breakfast. While the bread is baking, your family’s mouths will water as the incredibly delicious cinnamon and brown sugar aroma circles through the house! To sum it up briefly, this recipe will make you look like a kitchen master with minimal effort on your part! While there is a long rise time, it’s almost entirely hands-off and the dough is as simple as tossing basic pantry staples into a bowl and stirring it all up. Baker’s schedule: The rise times will depend on how cold oe warm the environment is, the colder the house the slower the dough will ferment.  How to make sourdough cinnamon pumpkin Foccacia For this recipe, you will need a leavened sourdough starter. Read my other post about sourdough starters. I fed my sourdough starter at 3:00pm and by 6:00 p.m. it was ready for me to use! Once your sourdough starter is leavened ( risen), it’s time to mix the dough. To a large bowl, add 375 grams of warm filtered water, 100 grams leavened sourdough starter, 15 grams oil, 5 grams vanilla, 200 grams pumpkin puree, 45 grams sugar, 1/2 teaspoon ginger, 2 teaspoons cinnamon, and 2 tablespoons pumpkin pie spice. l. I use a food scale for accurate measurements. This is the one I have and love! It comes with a charger for easy charging. Mix all the ingredients using a dough whisk.  Then, add 600 grams of unbleached bread flour and 10 grams of fine sea salt. Mix the ingredients together to form a shaggy dough. Cover the bowl with either a shower cap or a tea towel. Recently, I started using shower caps to cover the bowls. It works so well! I just slip one over the bowl, and it stays in place. I bought a whole pack of them specifically for this, and I keep them in my proofing baskets for sourdough bread. Cover, then let the sourdough cinnamon pumpkin dough rest in a warm spot for 1 hour. Stretch and fold You will do three sets of stretch and folds, with 30-minute breaks in between. It will look like this: Strecth and folding will help to develop gluten which will create structure. It will also introduce air into the dough, resulting in those beautiful air bubbles focaccia bread is known for! Grab an edge and pull up, Be careful because focaccia dough has more water than regular sourdough bread. Sourdough focaccia bread is lighter, and it will rip much easier. Pull upwards as much as it would let you without ripping ( keep a damp hand  to prevent them from sticking to the dough). Fold it over to the middle. Turn the bowl and do the same till all sides are folded. Cover the bowl with saran wrap or a clean shower cap The next day: Iine a tall sheet pan with parchment paper and drizzled 1 tbl of olive oil over it. If you have a good nonstick sheet pan you don’t need to line it with parchment paper, just drizzle it with 1 tbl of olive oil. Let it rise! Once your dough is transferred into your baking vessel, gently spread the sourdough pumpkin dough to fit the pan. Try to be gentle; you don’t want to deflate it or rip it. Use your finger tips to spread it into all corners. Don’t dig your fingertips into the dough; you don’t want to disturb the bubbles inside. If the dough is too difficult to spread out, let it relax at room temperature for 20 minutes while covered with a towel, then continue. Once the sourdough cinnamon pumpkin focaccia dough is spread out, cover it with a tea towel and let it rise for 3-4 hours at room temperature. The dough will almost double in size and should have lots of bubbles on top. Pre-heat your oven to 450 F Toppings On top of the focaccia dough, drizzle 2 tablespoons of melted butter over the top of the dough, then evenly sprinkle 2 tablespoons of cinnamon and 1 cup of brown sugar. Make dimples To make dimples, simply place your finger tips into the well-fermented sourdough pumpkin focaccia dough until you reach the bottom of the pan. Do this all over the dough. Place the sourdough focaccia in the center rack of the oven and bake for 25 minutes or until the dough temperature hits 190 degrees F in the center or until the top is a light golden brown color. If the top is burning to much, place foil on top.  Let the sourdough cinnamon pumpkin focaccia cool for 10 minutes in the baking dish, then remove it and let it cool on a wire rack.  While the sourdough pumpkin focaccia is cooling, make the cream cheese icing. Combine the cream cheese, powdered sugar, and milk in a small bowl and whisk with a handheld mixer until smooth. Drizzle the cream cheese over the focaccia. I hope you love this recipe as much as we do! ​Other fall sourdough

Ukranian Banosh

Ukranian Banosh is corn porridge cooked in milk and sour cream and then topped with feta cheese, bacon, and mushrooms. This is a hearty and classic dish that most Slavic households have on a rotation for family dinners.  Growing up, my mom always made mamaliga, which is cornmeal. But my mother cooked it a little differently than how I make Ukrainian banosh; my mom made mamaliga using water for cooking it, and she made it thicker so that you could cut it into pieces. My neighbor Marina moved to America two years ago, and she shared how to make Ukranian banosh with me. My whole family fell in love with the concept of this dish! I love how there are so many different variants of mamaliga, and it changes slightly from family traditions.  Ukranian Banosh, sometimes called banush, is a type of porridge made from cornmeal, cream or milk, and sour cream. It is a staple in the cuisine of the Hutsuls, a Slavic ethnic group residing in Western Ukraine. Banosh is typically served with feta (sheep’s cheese) and bacon, making it irresistible when it hits the table. The whole family loves this dish, including little kids!  AS AN AMAZON ASSOCIATE, THIS POST MAY CONTAIN AFFILIATE LINKS. THIS WILL NOT CHANGE YOUR PRICE, BUT IT WILL SHARE A SMALL COMMISSION WITH OUR FAMILY. Cornmeal (mamaliga): Toppings: The main components of banosh is cornmeal porridge with feta cheese. From there you can add whatever your heart desires! Alter the toppings to your family’s liking.  Garlic sauce Garnish Recipe Tips and Substitutions Before you make this recipe for Ukrainian Banosh, read through these tips and tricks to know what to expect and what to substitute if you get stuck! Pin it for later! Ukrainian Banosh Recipe Preparing your toppings will take the longest, as the cornmeal only takes a few minutes to cook. Dice the bacon into small pieces and cook it in a large skillet until it is cooked. Remove the bacon but leave the fat in the skillet.  Dice one large onion and saute it in the bacon fat. Once the onions are golden brown, add sliced mushrooms and a pinch of salt to taste. Continue to saute the onions and mushrooms for 2-3 minutes or until the mushrooms are soft. Shred the mozzarella cheese and dice the tomatoes. I prefer to use cherry tomatoes as they don’t become soggy.  Place a large pot over medium-high heat. Add the milk, water, and salt, then bring to a low simmer. While whisking the liquids, slowly pour in the cornmeal in a thin stream; do not stop stirring to avoid clumps to have a smooth porridge. Turn the heat down to low and keep stirring for 90 seconds. Turn the heat off. Switch to a wooden spoon, then add the butter and the sour cream, mixing until you have a smooth and creamy texture. Pour the cornmeal into a large dish of your choice, add the cheeses first, then the rest of the toppings. Let a few droplets of oil from the bacon go on top of the cornmeal for extra flavor. Garnish with fresh dill, garlic sauce, and a few extra dollops of sour cream.  This makes a perfect side dish to accompany any grilled meat, or it can be a full meal on its own! Enjoy it while it’s hot!  More easy dinner recipes you will love!

Sourdough pumpkin cream cheese muffins

If you love all things sourdough, then this recipe is for you! These Sourdough pumpkin muffins are pipped with cream cheese filling and have beautiful fall flavors. They are fluffy and moist, packed with my favorite spices: pumpkin pie spice and cinnamon. These muffins are great make-ahead breakfast, kids’ lunchboxes, or when you crave a delicious fall snack. This recipe uses simple ingredients like butter and pumpkin puree to produce the most irritable fluffy texture!  AS AN AMAZON ASSOCIATE, THIS POST MAY CONTAIN AFFILIATE LINKS. THIS WILL NOT CHANGE YOUR PRICE, BUT IT WILL SHARE A SMALL COMMISSION WITH OUR FAMILY. It took me a while to jump on the pumpkin spice bandwagon, but I became obsessed once I tried these cream cheese-stuffed sourdough pumpkin muffins! At one point, I baked them twice in one week! No regrets here! They make the perfect breakfast on the go, I even made some for teachers for kids’ schools.  If you love Starbucks pumpkin cream cheese muffins, you are in for a treat! I am about to save you so much money if you go through the Starbucks drive-through during the fall season; this recipe is simple to make and hits the spot every time!  I make a double batch and keep them in the fridge in an airtight container, then heat it up for 30 seconds before enjoying the sourdough pumpkin muffin with my morning coffee.  Pin it for later! This recipe is a great way to use up any extra sourdough starter you might have in the fridge! You can also use an active sourdough starter if that’s all you have on hand. The starter adds a little tang to this recipe that goes well with the sweet pumpkin muffin, making this the best sourdough discard pumpkin muffins! You can decorate these cream cheese-filled muffins with pumpkin seeds or add a streusel topping.  Ingredients you will need for sourdough pumpkin cream cheese muffins: Tools you will need: These sourdough pumpkin Cream Cheese Muffins are full of pumpkin flavor and are the best pumpkin muffin recipe! They are super easy to make, take no time to whisk together, and taste absolutely amazing. They are simple and full of flavor! I always start to crave these once the cooler weather starts to peak through the window.  How to make sourodugh pumpkin cream cheese muffins? ​How to turn this recipe into pumpkin bread? Instead of diving the dough into muffin tins, pour the batter into a greased bread pan, pipe the cream cheese filling into the center of the loaf, sprinkle the pumpkin seeds on top, then bake at 350 for 45-55 minutes or until it passes the toothpick test.  More sourdough recipes that you will love NEVER MISS A POST! FOLLOW ME ON: FACEBOOK | INSTAGRAM | TIKTOK |  Hashtag your photos @lizasfarmhouse so I can see your creations and get a chance to be featured!

Broken glass Jell-O 

Broken glass Jell-o is a fun recipe for any occasion! Different colors of Jello float in a sour cream and condensed sweetened milk gelatin mixture. It is called “broken glass” because it looks like stained glass when cut into. It’s the perfect no-bake dessert for too-hot-to-handle days! This classic make-ahead dessert recipe looks lovely on a buffet table and is always a hit at holidays, potlucks, and luncheons! Depending on the event or holiday, you can change the jello flavors to create your color scheme.  Jell-O flavors ( and color) options: There are so many options you can make with different colors and flavors! Have fun with it 🙂 Broken glass Jello is perfect for any occasion and is one of our go-to summer desserts! It’s great for summertime barbecues, family gatherings, or any special event you have going on. It’s delicious and fun to eat and makes for an eye-catching addition to any dessert table “Have you ever tried Broken Glass dessert? It’s a classic recipe that has been popular for decades. I have early memories of my mom making broken glass Jell-O for our birthdays and how much we loved it!  Doesn’t it look beautiful? It resembles a mosaic or stained glass window. Although it may seem like a lot of work, it’s effortless!  It’s delicious and fun to eat and makes for an eye-catching addition to any dessert table for various occasions. Pin it for later! What is Broken glass Jell-O? Broken Glass Jell-O (aka Stained Glass Jell-O) consists of different flavors of Jell-O cubes submerged in a condensed milk-gelatin mixture. It chills in the refrigerator until solid and then is cut into squares. It’s so colorful and delicious. When served, it mimics the look of beautiful church windows.  AS AN AMAZON ASSOCIATE, THIS POST MAY CONTAIN AFFILIATE LINKS. THIS WILL NOT CHANGE YOUR PRICE, BUT IT WILL SHARE A SMALL COMMISSION WITH OUR FAMILY. Ingredients for broken glass jell-o mix each pack of jello with 1 cup of hot water White Jello Step 1 – set the flavored Jello-o  You’ll need several colorful gelatin packets in different flavors of your choice.  Prepare the first layer: Dissolve one packet of colorful gelatin (flavor of your choice) in 1 cup of boiling water. Stir well until the gelatin is completely dissolved. Then add 1/2 cup of cold water. Stir, then pour into a pan: Pour the mixture into a rectangular pan and let it cool. I made my jello about 1 1/2 inches thick, but you can make them whatever thickness you prefer. Place the pan in the refrigerator to allow the gelatin to set. It usually takes around 30 minutes to an hour. Repeat the same for each additional flavor of gelatin. I recommend using at least two different flavors.  Step 2 – Make the Sweetened Condensed Milk Mixture Once the flavored Jell-o is ready, make the sour cream and sweetened condensed mixture. First, mix the unflavored gelatin with 2 cups of hot water or you can also use milk. (It doesn’t need to boil; it’s just hot. I microwaved the milk for 2 minutes) Let the mixture cool a little while you’re doing the next step.  Then, add the sour cream and condensed milk into a large bowl and mix using a hand mixer until well combined.  While mixing, slowly drizzle in the unflavored gelatin with the water and mix to incorporate. Pour the gelatin through a sieve to make sure that no bits of dry gelatin get into the cream.  Set aside.  Once all your jello is ready, it’s time to create the broken glass effect. Cut the jello into small blocks that are 1 inch big. Using a flipping spatula, carefully layer half of each color into a deep glass dish (or cups), then pour half of the white jello over it ( it is okay if it breaks a little). Lastly, place the rest of the jello cubes on top and pour the rest of the white jello over it. Ensuring it fills the cracks and crevices. Step 3 – Chill and Set Return the broken Jell-o to the refrigerator and let the dessert chill for 2 hours or until the condensed milk layer is set.  Serve! Top it with whipped heavy cream, white chocolate, fresh fruit, or lemon curd.  Jello Tips If you are using a bundt pan  If you would like to make a tall broken glass jelly-o, double this recipe to fill the bundt pan to the top. Follow the recipe as written above; layer the jello into a bundt pan. Once the jello is set, fill the sink with hot water. Carefully hold the bundt pan in the hot water for 30 seconds. This will help the jello loosen up, and when you flip it over, the jello won’t tear. Be careful not to hold it for too long, as you don’t want the jello to melt.  Hold a large flat plate over the pan, hold the plate and the pan, and then gently flip it over. Serve the broken glass Jell-o immediately. Enjoy!  How to Store Your Jello To store your jello, cover the broken Jell-o with plastic wrap. Place it in the refrigerator to keep it chilled to maintain its firm texture. Like this recipe? Try my other desserts NEVER MISS A POST! FOLLOW ME ON: FACEBOOK | INSTAGRAM | TIKTOK |  Hashtag your photos @lizasfarmhouse so I can see your creations and get a chance to be featured!